DOM: Document Object Model
The DOM is a JavaScript representation of a webpage It's your JS "window" into the contents of a webpage.
It's a bunch of objects that you can interact with via JS.
On dev tools; type console.dir(document) to see the objects and properties that make the website.
Selecting
getElementById
Indicate which element you want to select asking the DOM for that ID. e.g.
document.getElementById("toc")
You can use it to create a vairblee.g.
const content = document.getElementById("toc")
on console type "toc" or console.dir(toc) to get the properties like children elements, tag, and so on of such.
getElementById Practice
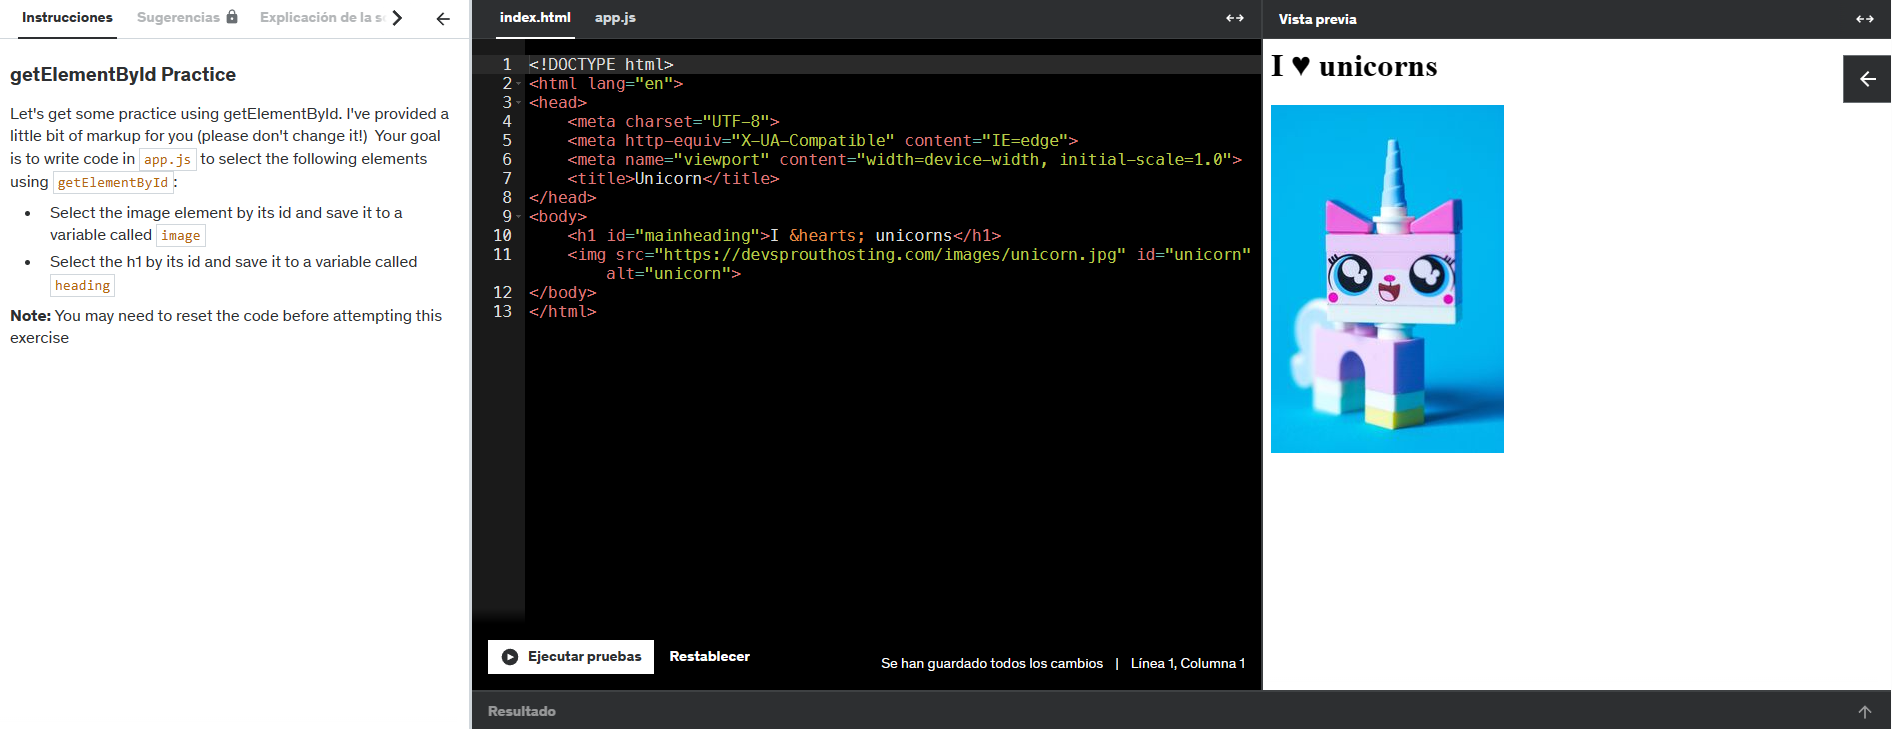
Let's get some practice using getElementById.
- Select the image element by its ID and save it to a variable called image
- Select the h1 by it's ID and save it to a variable called heading
// Write your preview in here:
const image = document.getElementById("unicorn");
const heading = document.getElementById("mainheading");
getElementsByTagName
The getElementsByTagName method of Document interface returns an HTMLCollection of elements with the given tag name. e.g.
function getAllParaElems() {
const allParas = document.getElementsByTagName("p");
const num = allParas.length;
alert(`There are ${num} paragraph in this document`);}
onclick ="getAllParaElems();"
Show all p elements in document
document.getElementsByTagName('img')
// returns:
HTMLCollection(4)
[img#banner, img.square, img.square, img.square, banner:img#banner]
const allImages = document.getElementsByTagName('img')
const allImages = document.getElementsByTagName('img')
change images sourcefor (img of images) { img.src = es.wikipedia.org/wiki/Gibson_Les_Paul}
getElementsByClassName
The getElementsByClassName method of Document interface returns an array-like object of all child elements which have all of the given class name(s). e.g.
We can also use methods of Array.prototype on any HTMLCollection by passing the HTMLCollection as the method's this value. Here we'll find all div elements that have a class of'test': e.g.
const squareImages = document.getElementsByClassName('square')
change images sourcefor (img of squareImages) {img.src = es.wikipedia.org/wiki/Matisse_paintings}
querySelector()
a newer all-in-one method to select a single element.
The Document method querySelector() returns the first Element within the document that matches the specified selector, or group of selectors. If no matches are found, null is returned.
document.querySelector("h1")
document.querySelector("#red")
document.querySelector(".big")
document.querySelector("img:nth-of-type(2)")
document.querySelector("a[title='java']")
// returns the anchor element:(a)href="/wiki/Java" title="Java"(/a)
querySelectorAll()
Returns a collection of all matching elements.
The Document method querySelectorAll() returns a static (not live) NodeList representing a list of the document's elements that match the specified group of selectors.
// *Returns a JS object, NOT an array.
document.querySelectorAll("h1")
document.querySelectorAll("p a")
// Returns:NodeList(17) {a, a, a, a, a, a, ...}
// We can iterate over them using JSconst links = document.querySelectorAll("p a")
for (let link of links){console.log(link.href)}
// Returns the src url from each anchor within paragraphquerySelector Practice
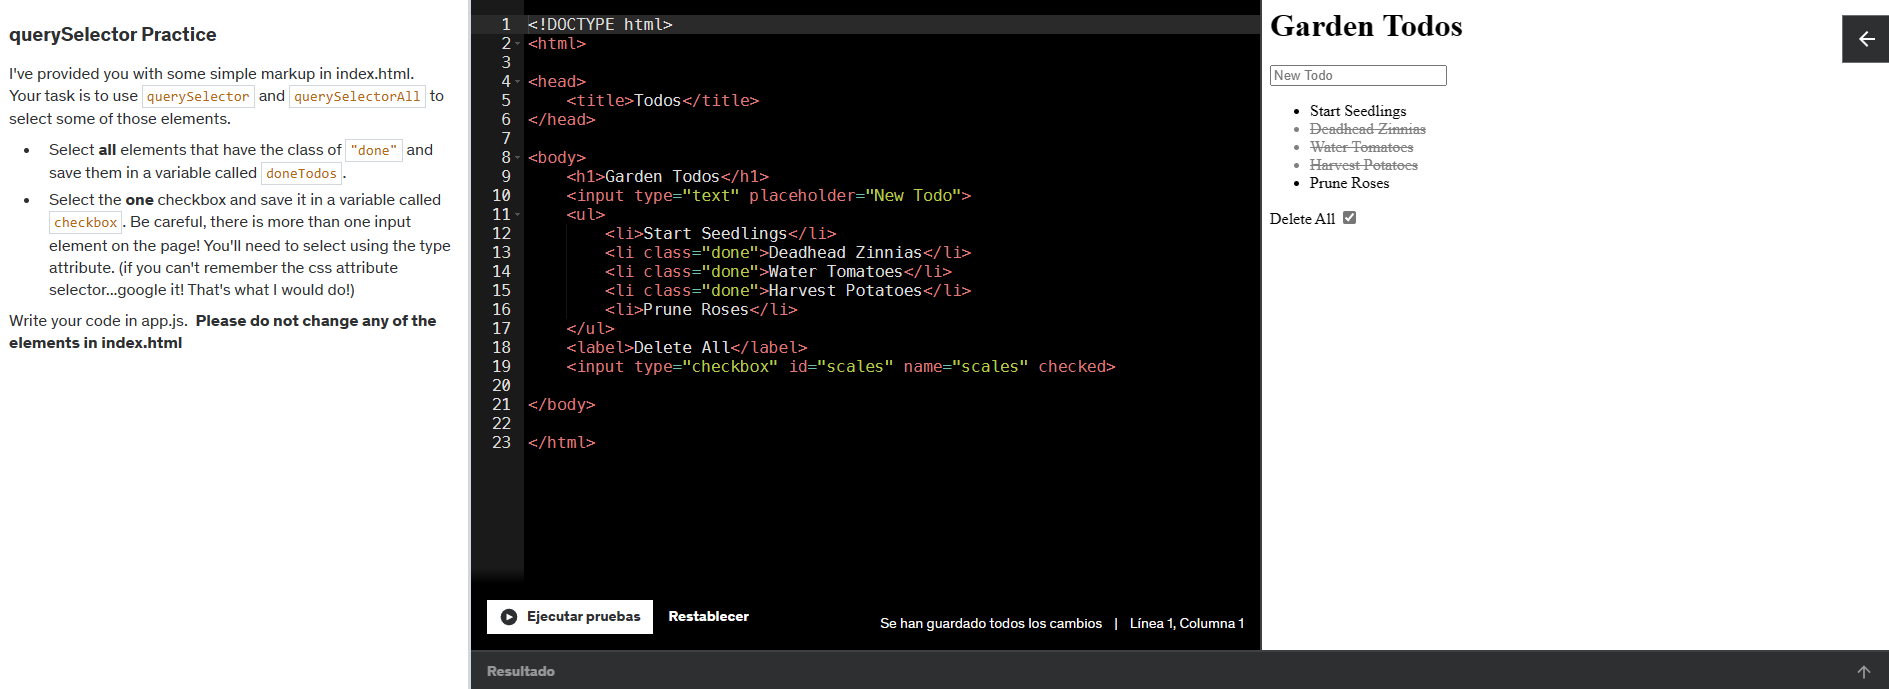
Let's get some practice using querySelector
- Select all elements that have the class of "done" and save them in a variable called doneTodos.
- Select the one checkbox and save it in a variable called checkbox. Be careful, there is more than one input element on the page! You'll need to select using the type attribute. (if you can't remember the css attribute selector...google it! That's what I would do!)
// Your code goes in here:
const doneTodos = document.querySelectorAll("li.done");
// selects all elements within li's
const checkbox = document.querySelector("#scales");
// selects the element with the id 'scales'
HTMLElement: innerText property
The innerText property of the HTMLElement interface represents the rendered text content of a node and its descendants.
As a getter, it approximates the text the user would get if they highlighted the contents of the element with the cursor and then copied it to the clipboard. As a setter this will replace the element's children with the given value, converting any line breaks into "br" elements.
Note: innerText is easily confused with Node.textContent, but there are important differences between the two. Basically,innerText is aware of the rendered appearance of text, while textContent is not.
const allLinks = document.querySelectorAll('a');
for (let link of allLinks) { link.innerText = "I am a link! click me!"}
// This changes the text shown on every 'a' element to 'I am a link! click me!'
Element: innerHTML property
The Element property innerHTML gets or sets the HTML or XML markup contained within the element.
*To insert the HTML into the document rather than replace the contents of an element, use the method insertAdjacentHTML().
This example fetches the document's current HTML markup and replaces the "<" characters with the HTML entity "<" , thereby essentially converting the HTML into raw text. This is then wrapped in a "pre" element. Then the value of innerHTML is changed to this new string. As a result, the document contents are replaced with a display of the page's entire source code.
document.documentElement.innerHTML = `${document.documentElement.innerHTML.replace(/< /g, "& l t;" , )}`;
// adding a sup to an "h1"
document.querySelector('h1').innerHTML += '"sup" new text "/sup"'
// this returns the "h1" with a superior text
querySelector Practice
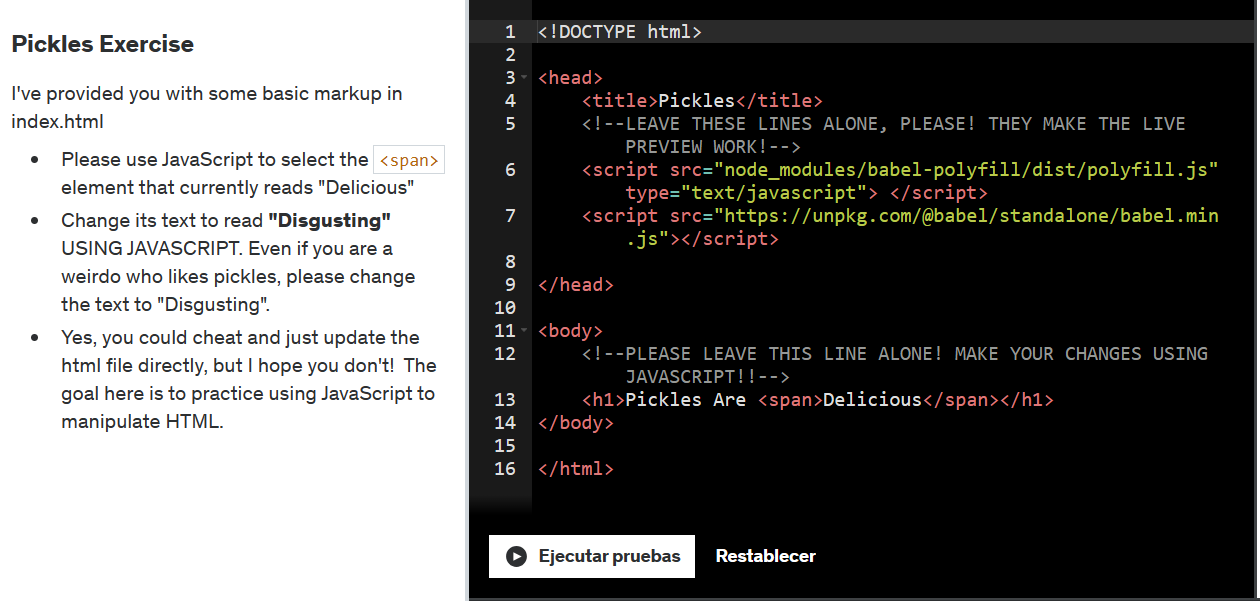
Let's get some practice using querySelector
- Please use JavaScript to select the 'span' element that currently reads "Delicious".
- Change its text to read "Disgusting" USING JAVASCRIPT.
const spanText = document.querySelector("span");
spanText.innerText = "Disgusting"
// This returns the span text changed to "Disgusting" as asked.
Element: classList property
The Element.classList is a read-only property that returns a live DOMTokenList collection of the class attributes of the element. This can then be used to manipulate the class list.
Element: getAttribute() method
The getAttribute() method of the Element interface returns the value of a specified attribute on the element.
Element: setAttribute() method
The setAttribute() method of the Element interface sets the value of an attribute on the specified element. If the attribute already exists, the value is updated; otherwise a new attribute is added with the specified name and value.
Manipulating Attributes Practice
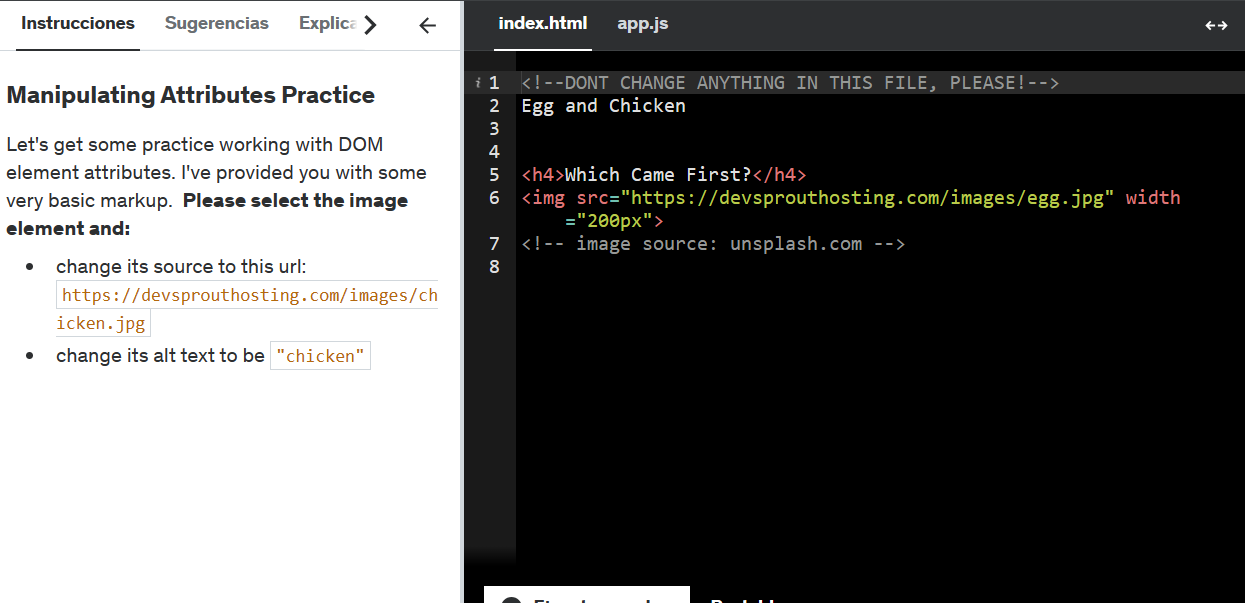
Let's get some practice using setAttribute() method
- Change its source to this url: "https://devsprouthosting.com/..."
- Change its alt text to be "chicken"
const image = document.querySelector("img");
image.setAttribute("src", "https://devsprouthosting.com/...");
image.setAttribute("alt", "chicken");Changing Styles
'style': The Style Information element
The 'style' HTML element contains style information for a document, or part of a document. It contains CSS, which is applied to the contents of the document containing the 'style' element.
You can declare something like: const h1 = document.querySelector('h1'); and change it to:
This way only works for inline style (which is rarely used)
h1.style.color = 'blue'
h1.style.fontSize = '3em'
h1.style.border = '2px dashed red'
const links = document.querySelectorAll('a')
for (let link of links) {link.style.color = 'rgb(0, 108, 134)'}
Magical Forest Circle Exercise
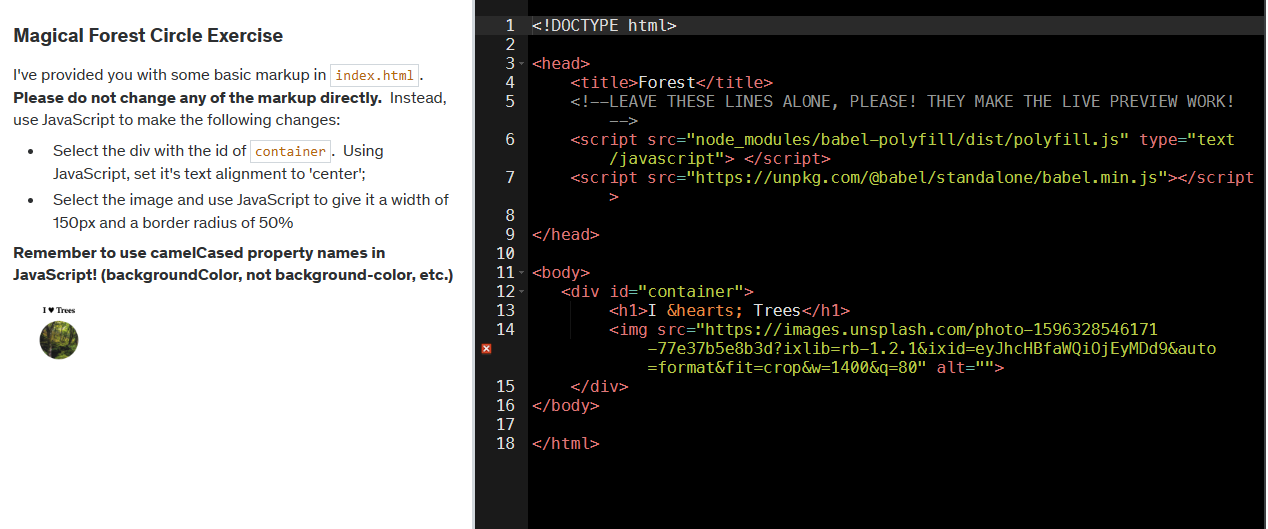
Let's get some practice using style, querySelector and some attributes:
- Select the div with the id of container. Using JavaScript, set it's text alignment to 'center'
- Select the image and use JavaScript to give it a width of 150px and a border radius of 50%
const container = document.querySelector("#container");
const image = document.querySelector("img");
container.style.textAlign = "center"
container.style.width = "150px"
container.style.borderRadius = "50%"
Rainbow Text Exercise
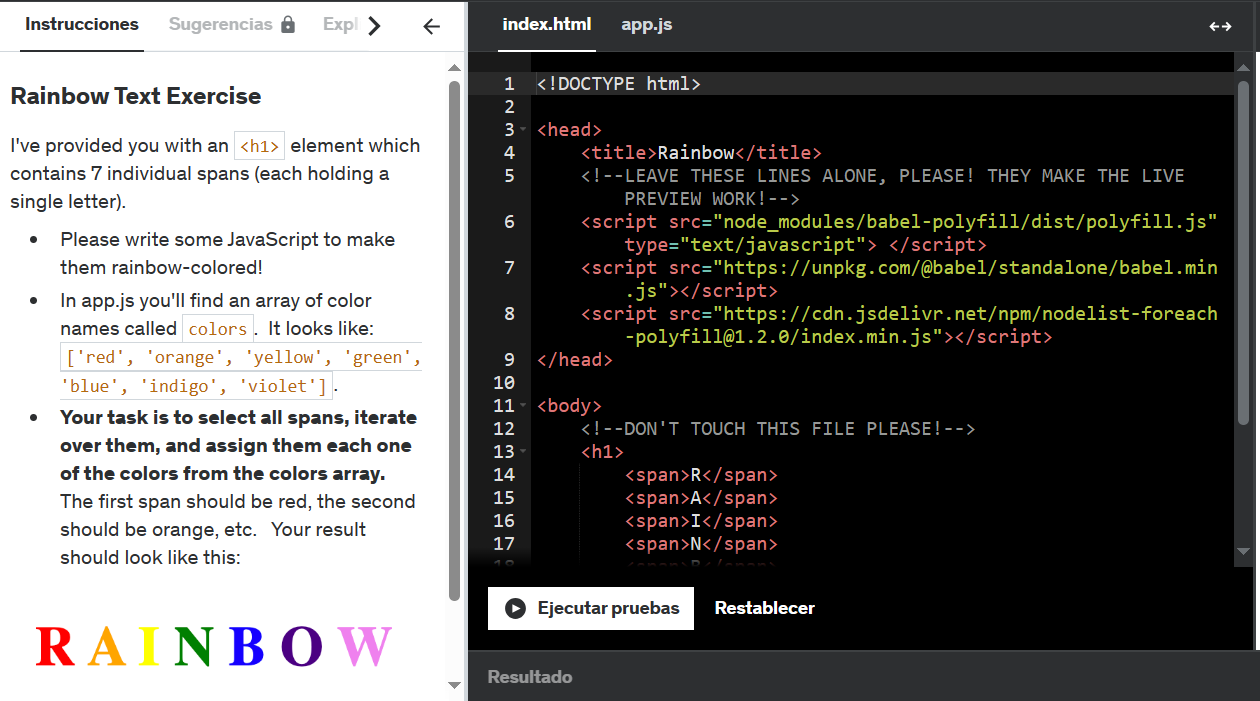
Let's get some practice using style, querySelector and some other methods:
- Please write some JavaScript to make them rainbow-colored!
- In app.js you'll find an array of color names called colors. It looks like: ['red', 'orange', 'yellow', 'green', 'blue', 'indigo', 'violet'].
- Your task is to select all spans, iterate over them, and assign them each one of the colors from the colors array. The first span should be red, the second should be orange, etc.

classList property
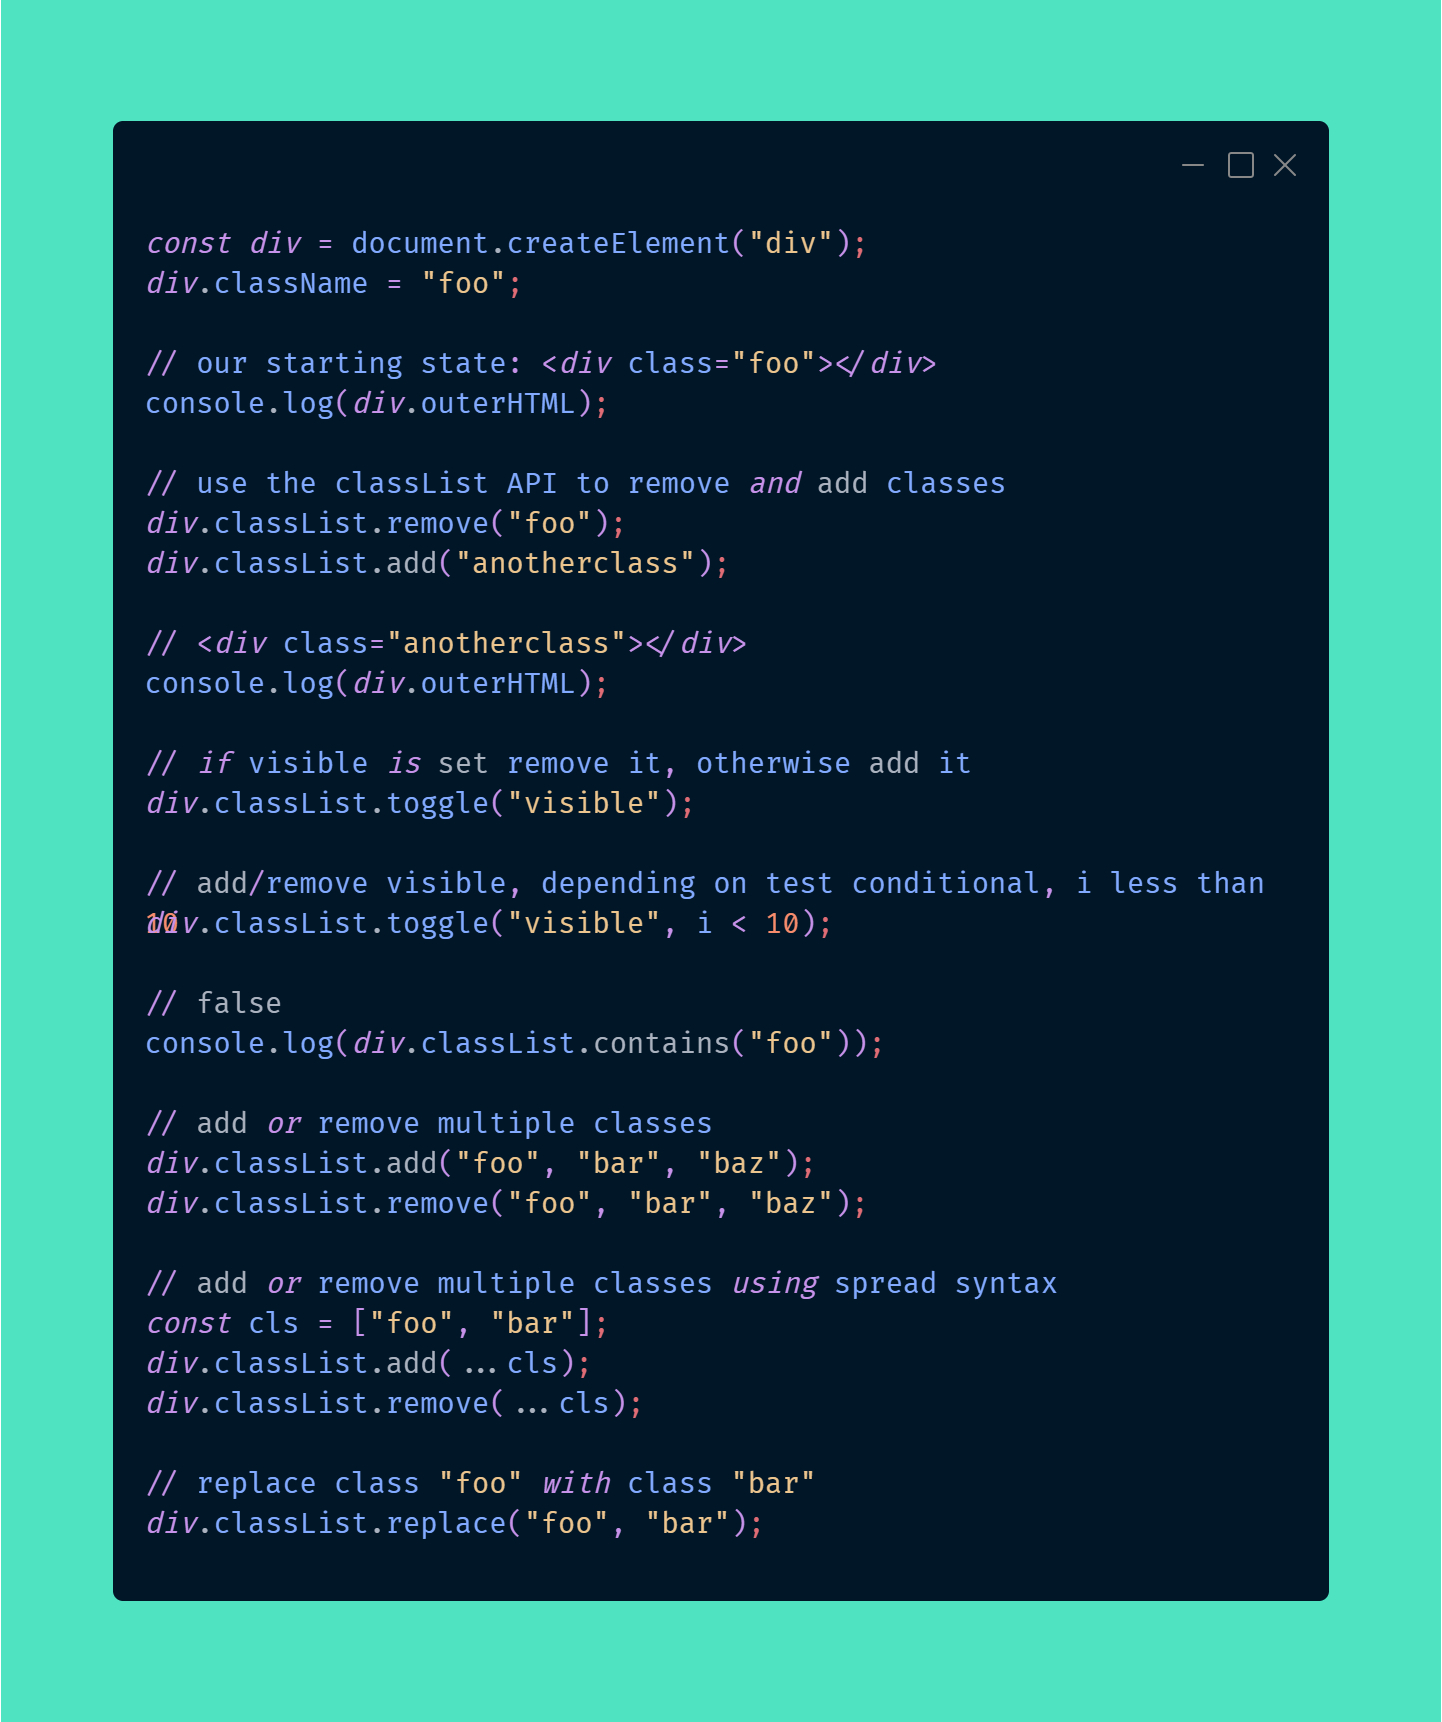
MDN info 📚The Element.classList is a read-only property that returns a live DOMTokenList collection of the class attributes of the element. This can then be used to manipulate the class list.
Using classList is a convenient alternative to accessing an element's list of classes as a space-delimited string via element.className. e.g.
ClassList Practice
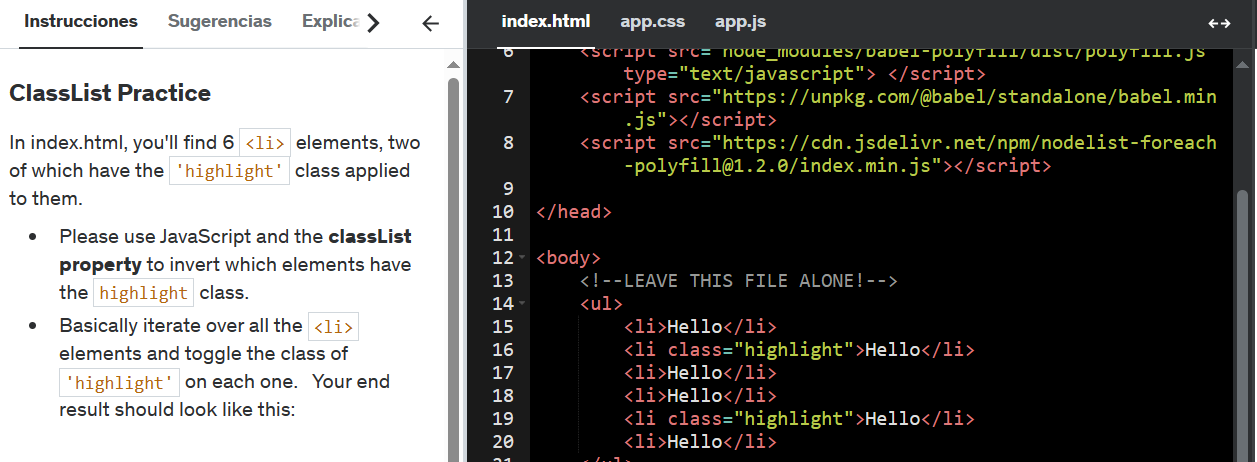
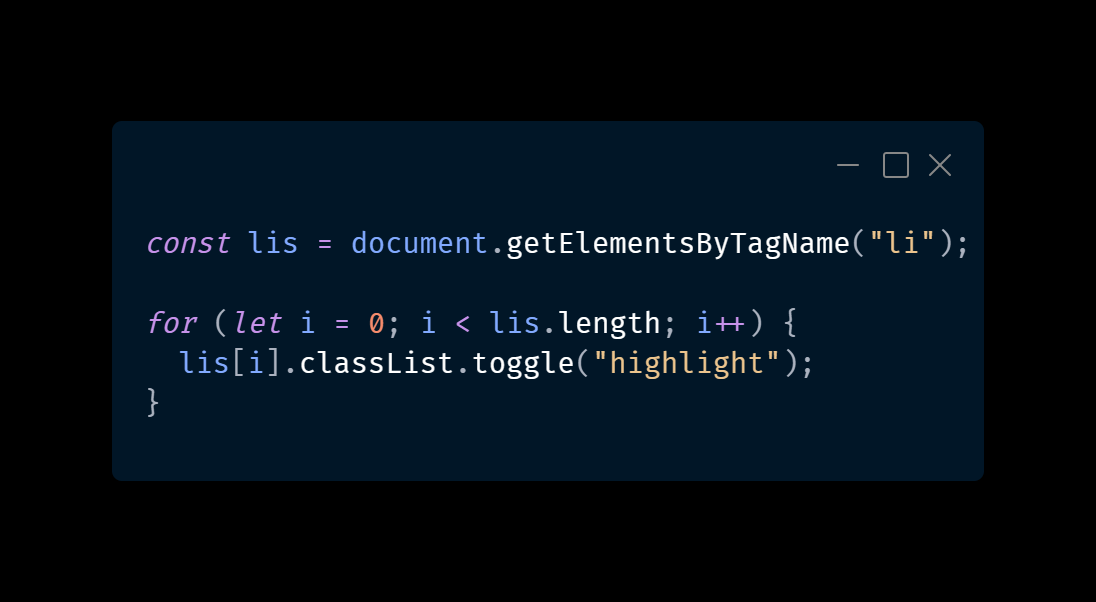
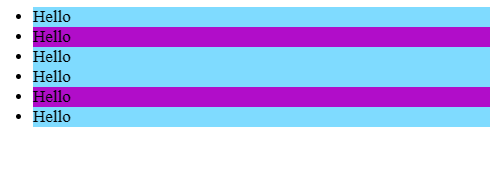
Let's get some practice using getElementsByTagName, classList and some iteration applying toggle to each iterated element to add/remove the 'highlight' class
- Please use JavaScript and the classList property to invert which elements have the highlight class.
- Basically iterate over all the elements and toggle the class of 'highlight' on each one.
Result:
Node: parentElement property
MDN info 📚The read-only parentElement property of Node interface returns the DOM node's parent Element, or null if the node either has no parent, or its parent isn't a DOM Element.
Element: children property
MDN info 📚The read-only children property returns a live HTMLCollection which contains all of the child elements of the element upon which it was called.
paragraph.children
HTML.Collection(8) [a,b,a,a,a,b,a,a]
paragraph.children[1]
'b'Silkie'/b'
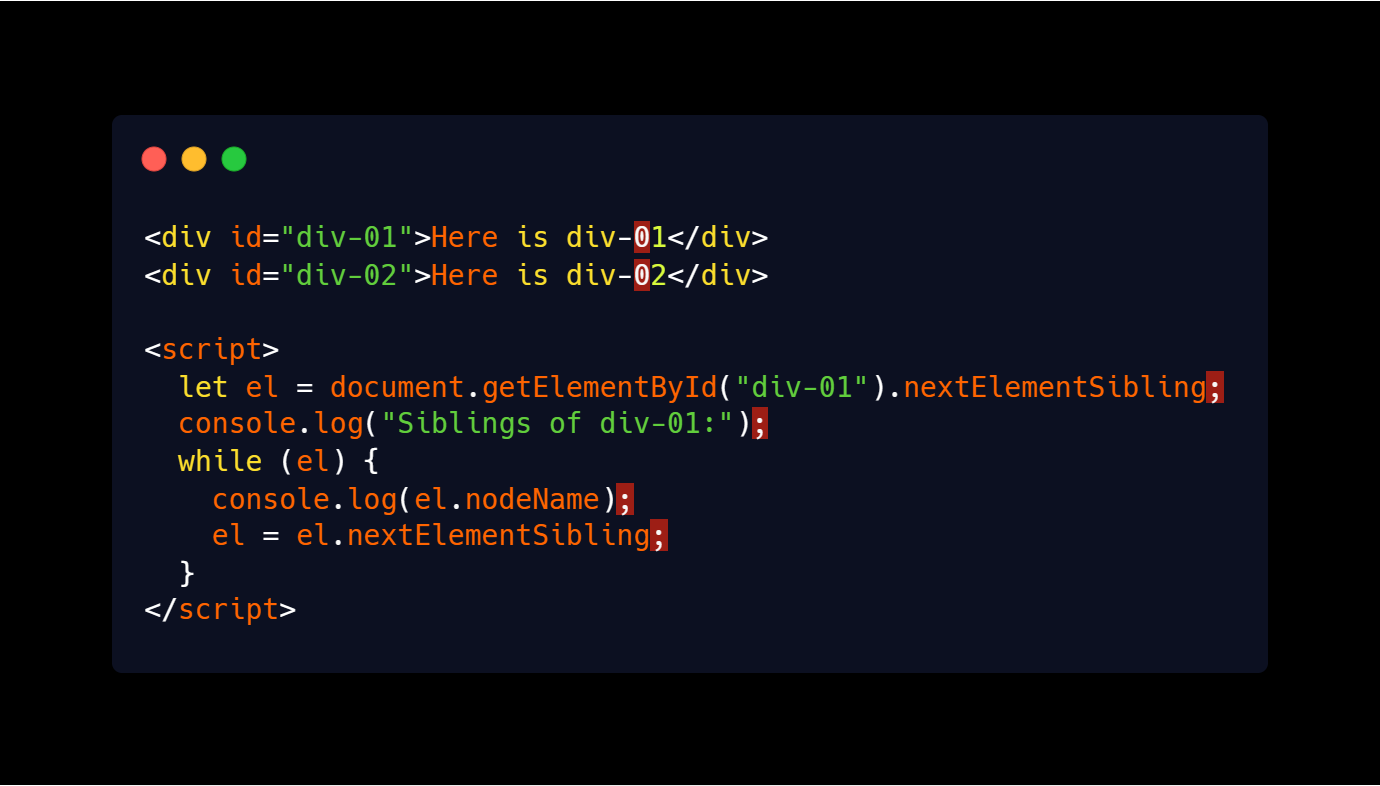
nextElementSibling property
MDN info 📚The Element.nextElementSibling read-only property returns the element immediately following the specified one in its parent's children list, or null if the specified element is the last one in the list.
previousElementSibling property
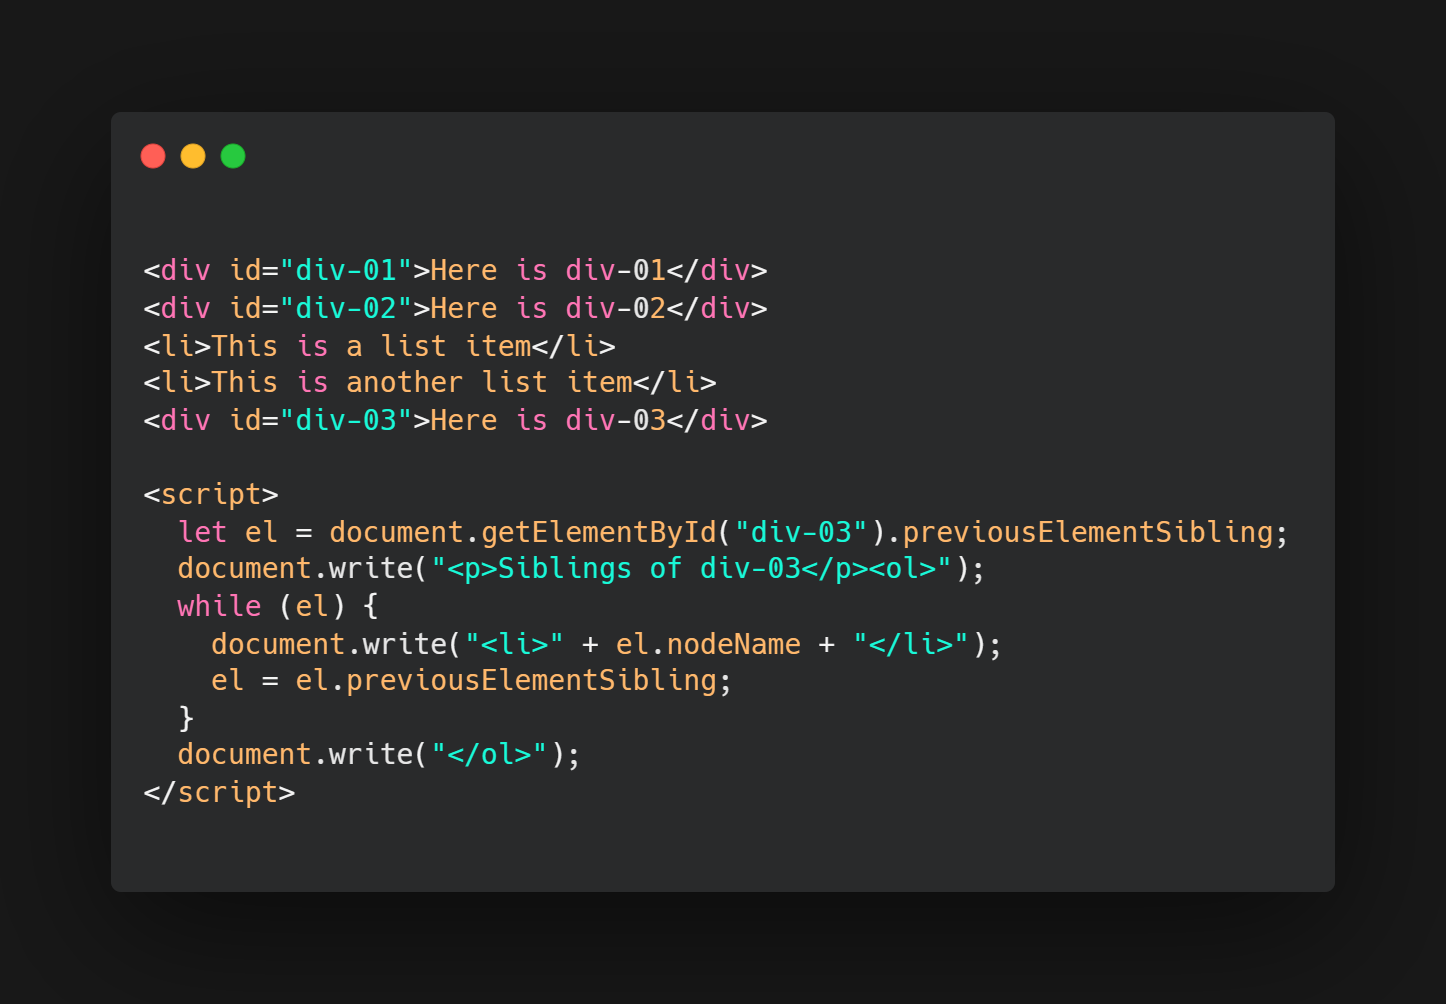
MDN info 📚The Element.previousElementSibling read-only property returns the Element immediately prior to the specified one in its parent's children list, or null if the specified element is the first one in the list.
Next-sibling combinator
MDN info 📚The next-sibling combinator (+) separates two selectors and matches the second element only if it immediately follows the first element, and both are children of the same parent element.
img + p { font-weight: bold; }
createElement() method
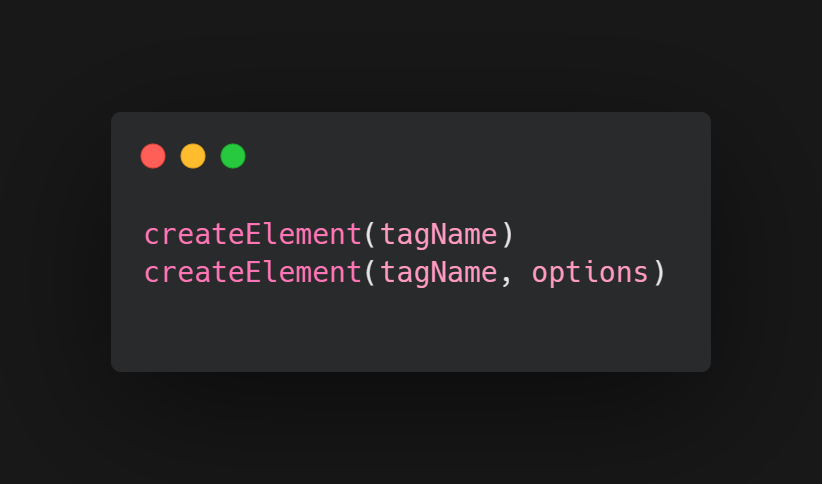
MDN info 📚In a HTML document the document.createElement() method creates the HTML element specified by tagName, or an HTMLUnknownElement if tagName isn't recognized.
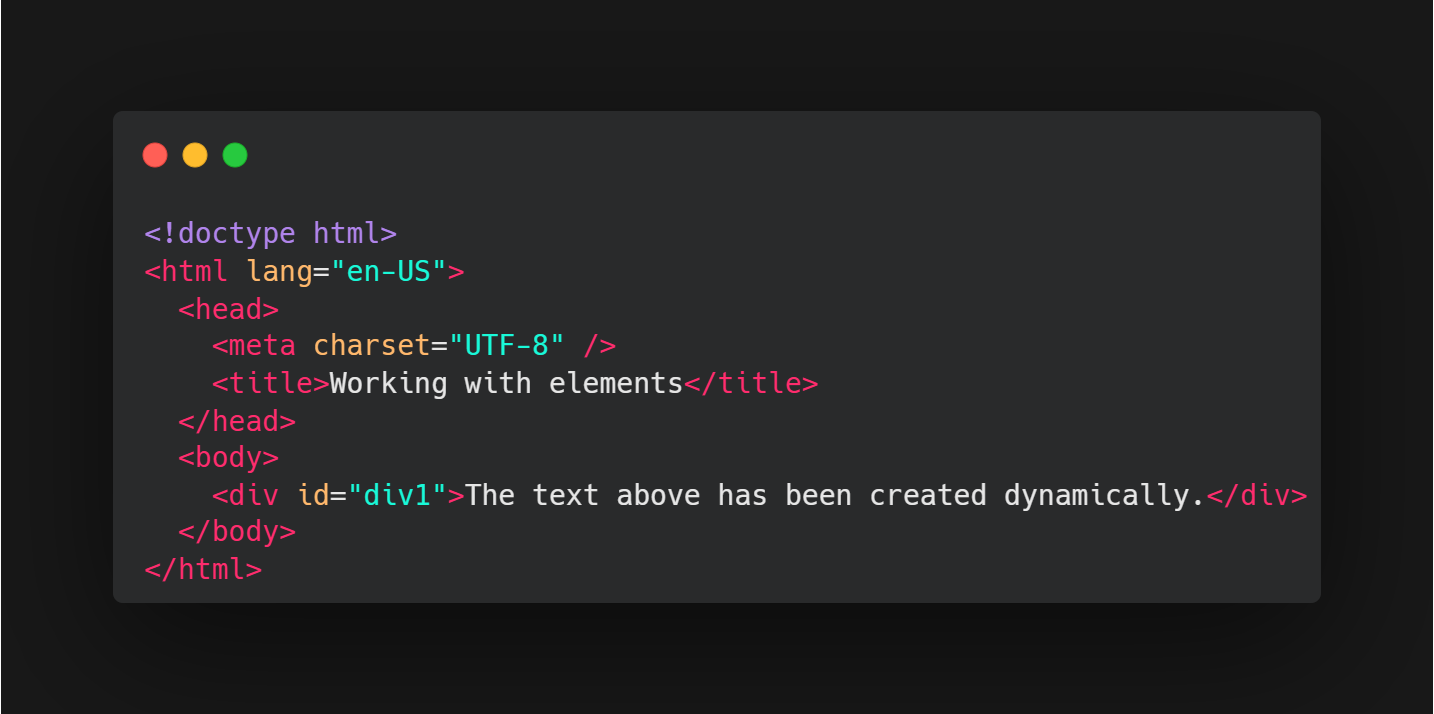
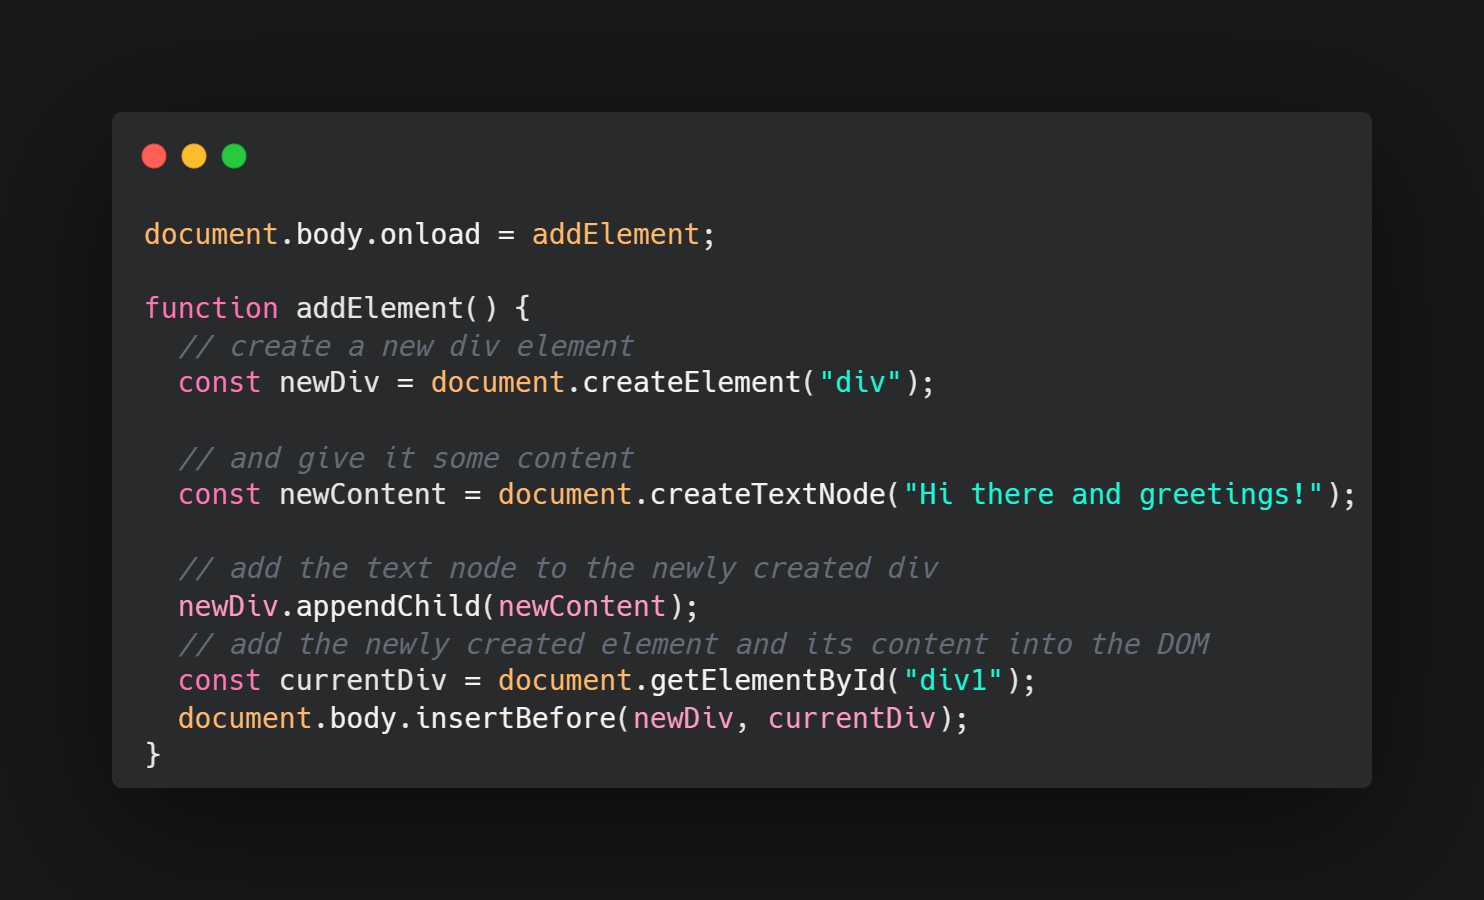
Basic Example
This creates a new 'div' and inserts it before the element with the ID "div1".
Javascript
Web component example
The following example snippet is taken from our expanding-list-web-component example (see it live also). In this case, our custom element extends the HTMLUListElement, which represents the 'ul' element.
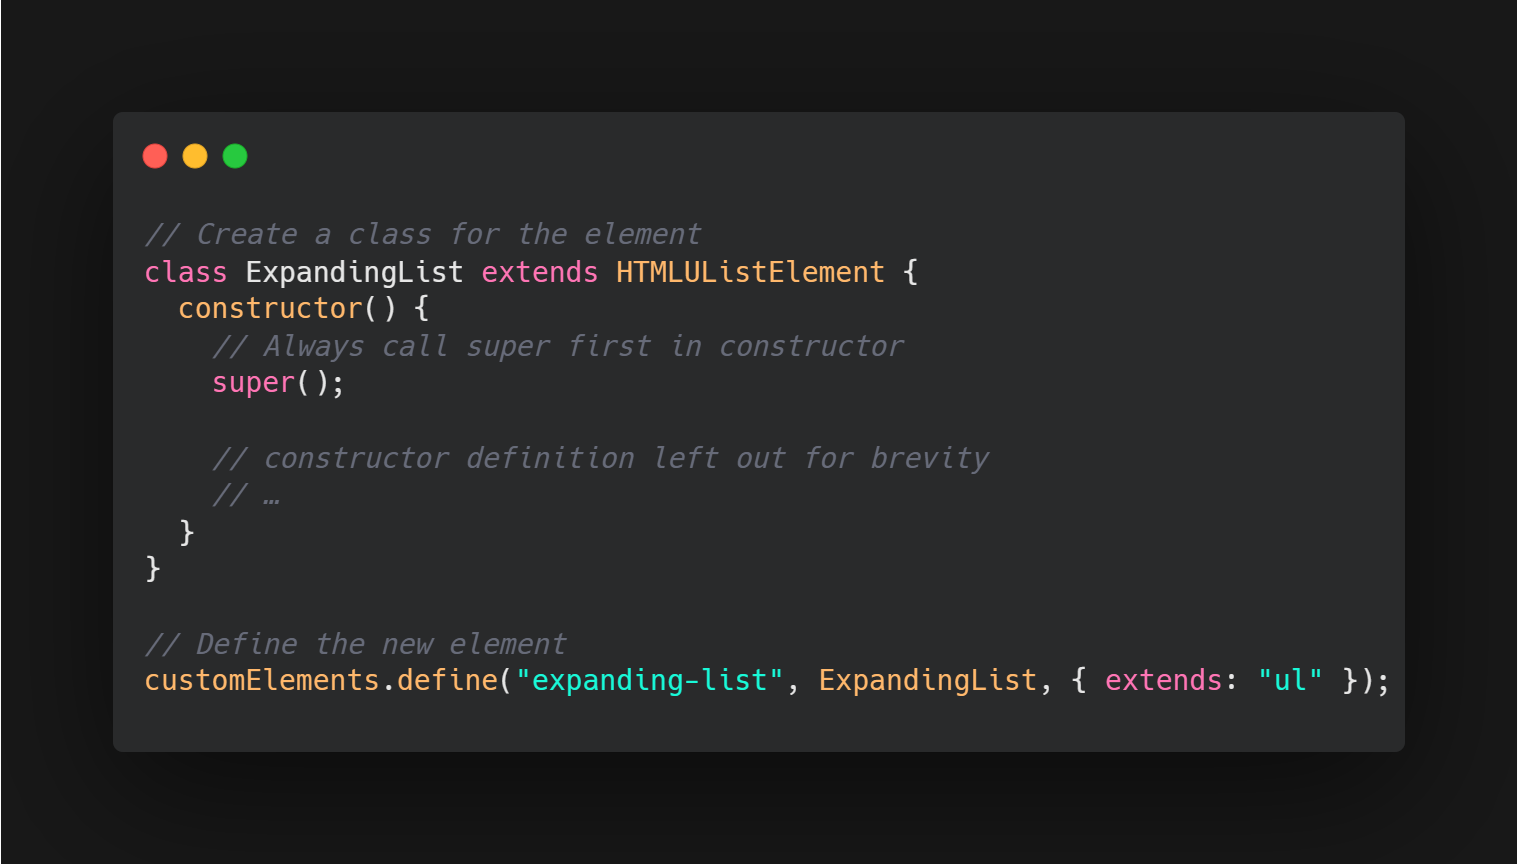
Javascript
If we wanted to create an instance of this element programmatically, we'd use a call along the following lines:

append() method
MDN info 📚In a HTML document the document.createElement() method creates the HTML element specified by tagName, or an HTMLUnknownElement if tagName isn't recognized.
Differences from Node.appendChild() :
- Element.append() allows you to also append string objects, whereas Node.appendChild() only accepts Node objects.
- Element.append() has no return value, whereas Node.appendChild() returns the appended Node object.
- Element.append() can append several nodes and strings, whereas Node.appendChild() can only append one node.
Javascript:
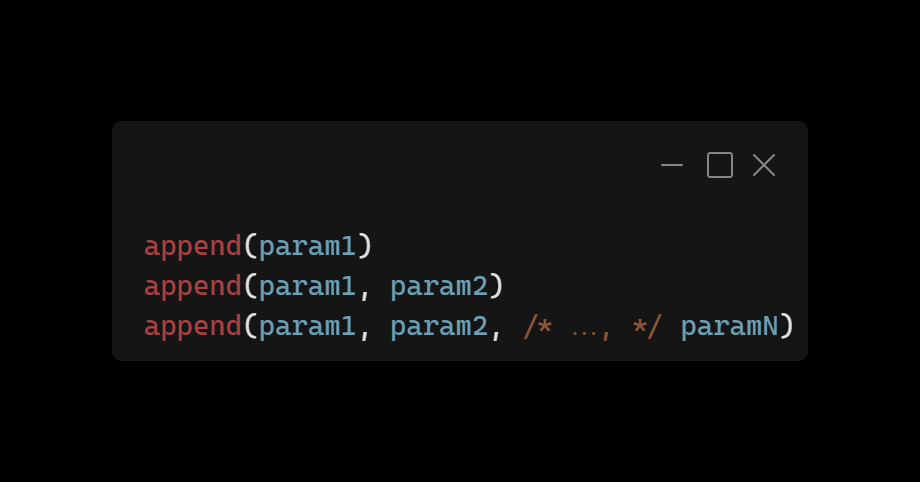
A set of Node or string objects to insert.
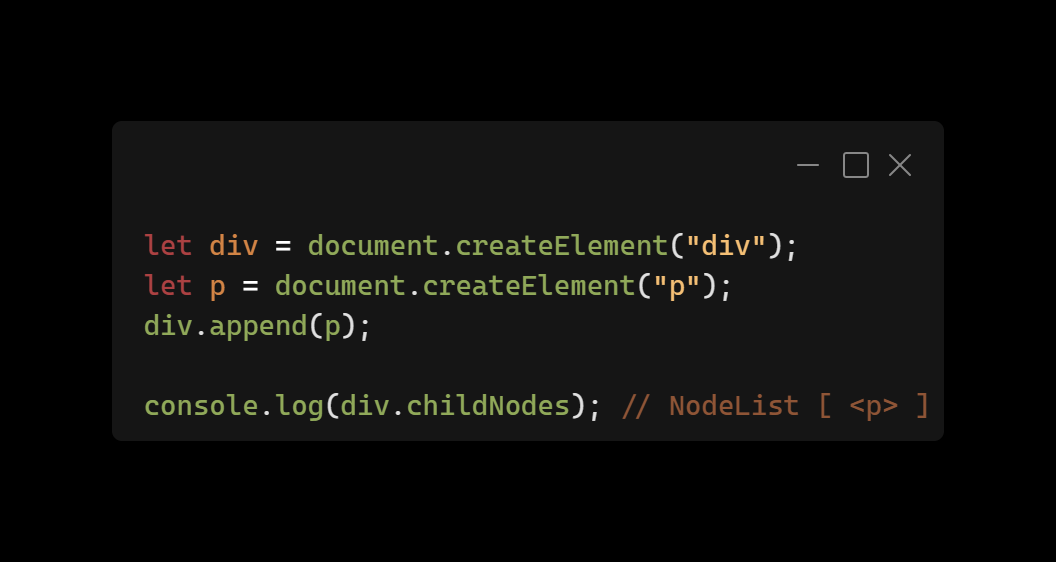
Appending an element
Javascript:
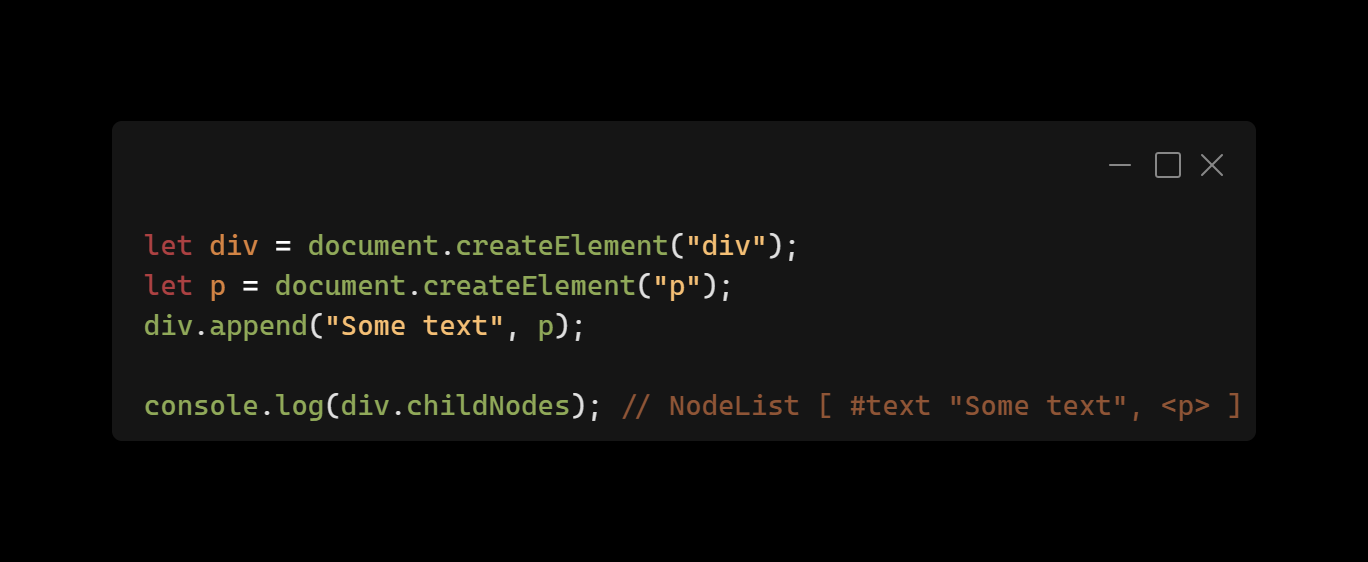
Appending an element and text
Javascript:
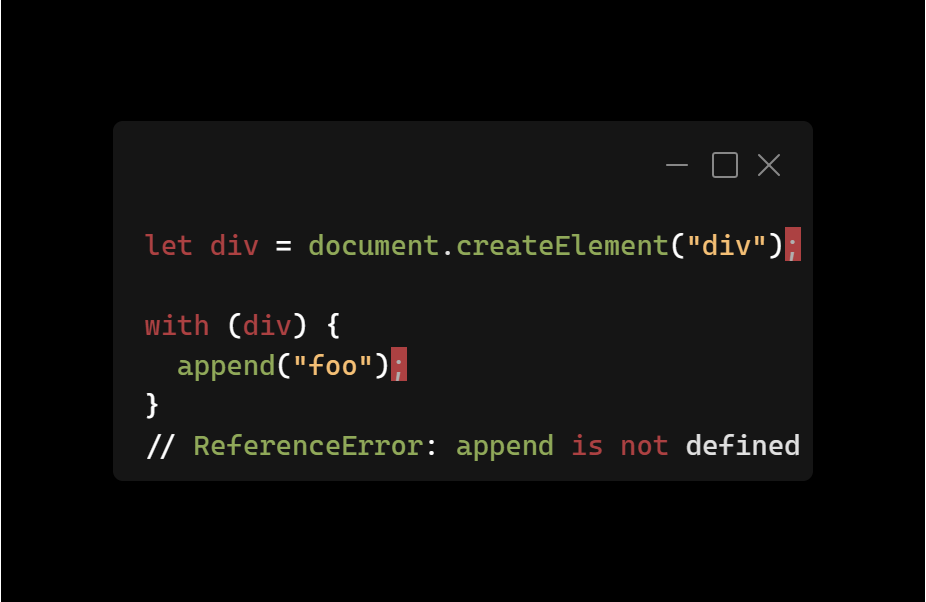
The append method is unscopable
Javascript:
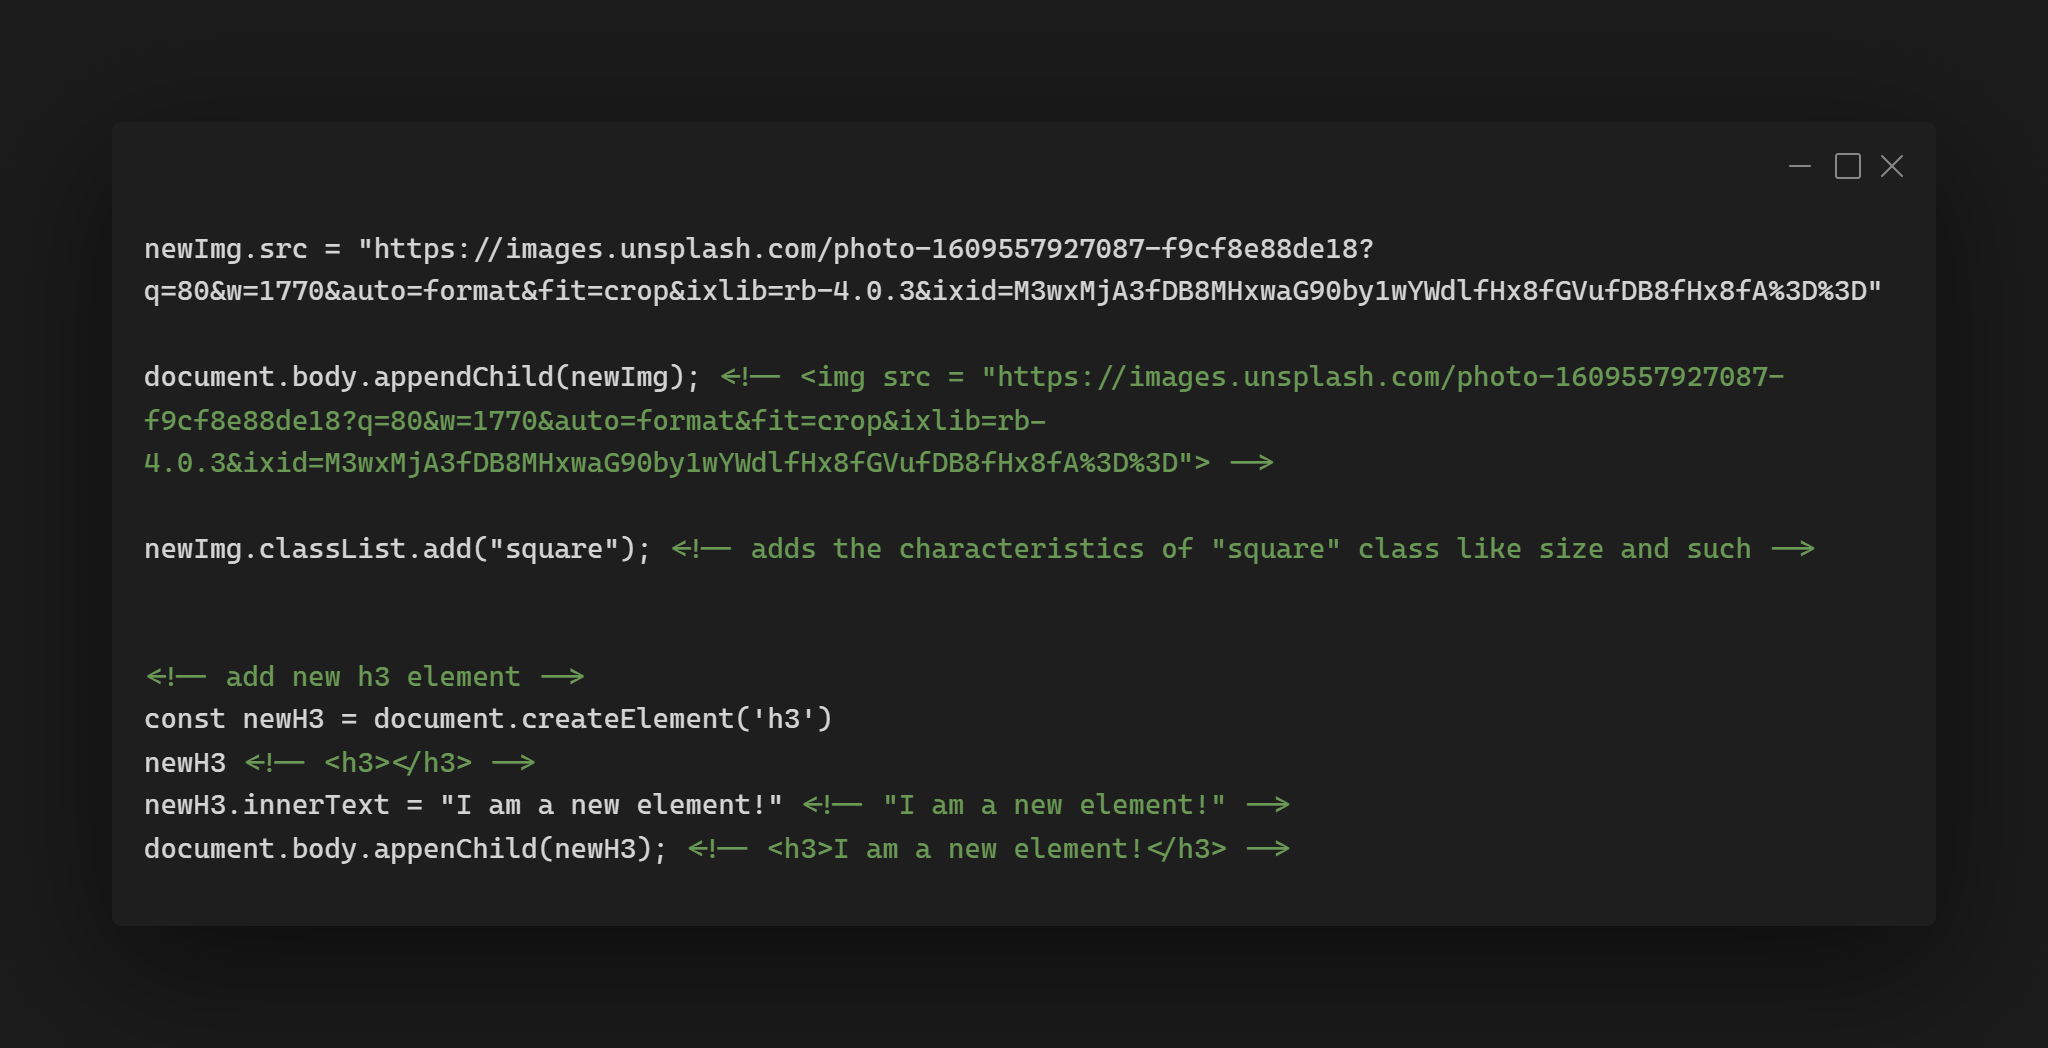
Javascript:
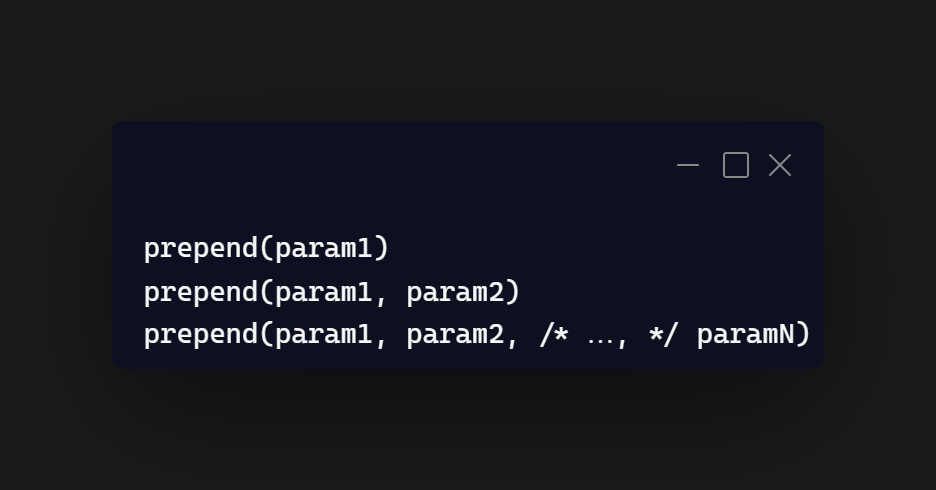
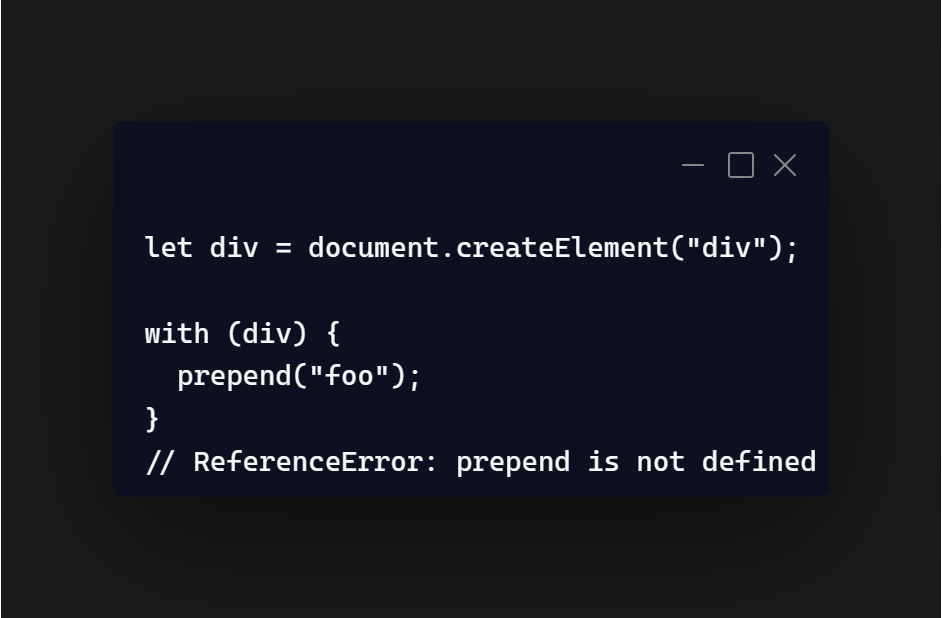
Element: prepend() method
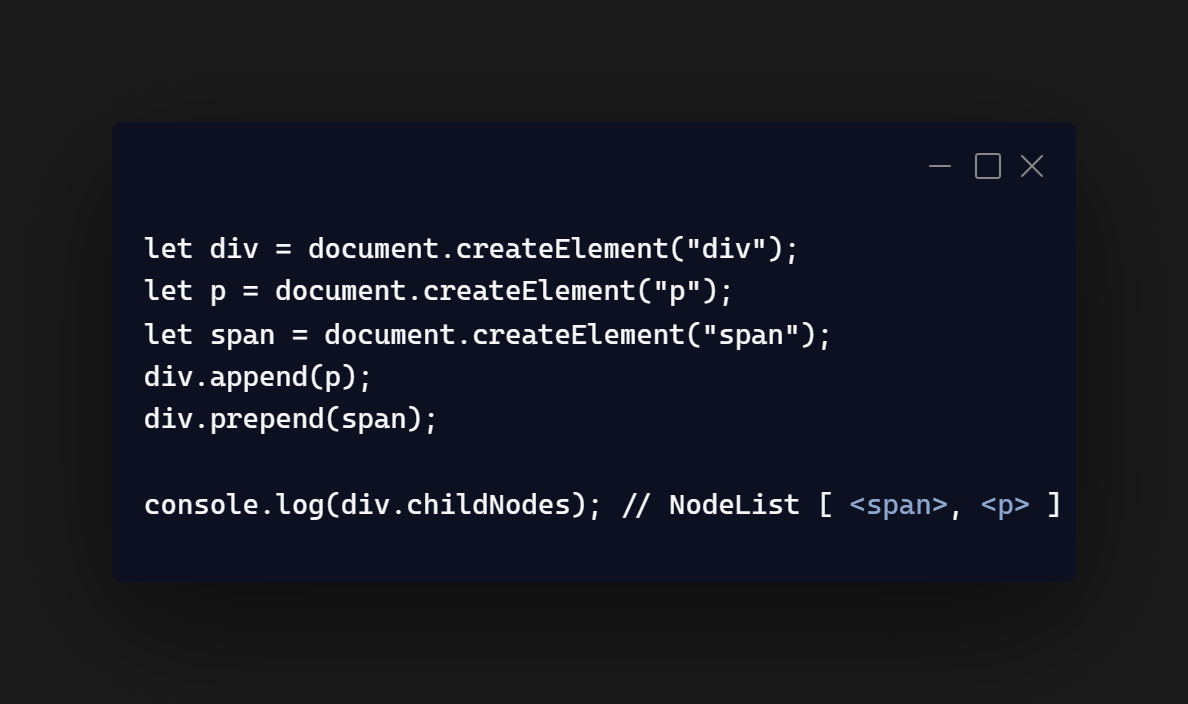
MDN info 📚The Element.prepend() method inserts a set of Node objects or string objects before the first child of the Element. String objects are inserted as equivalent Text nodes.
Prepending an element
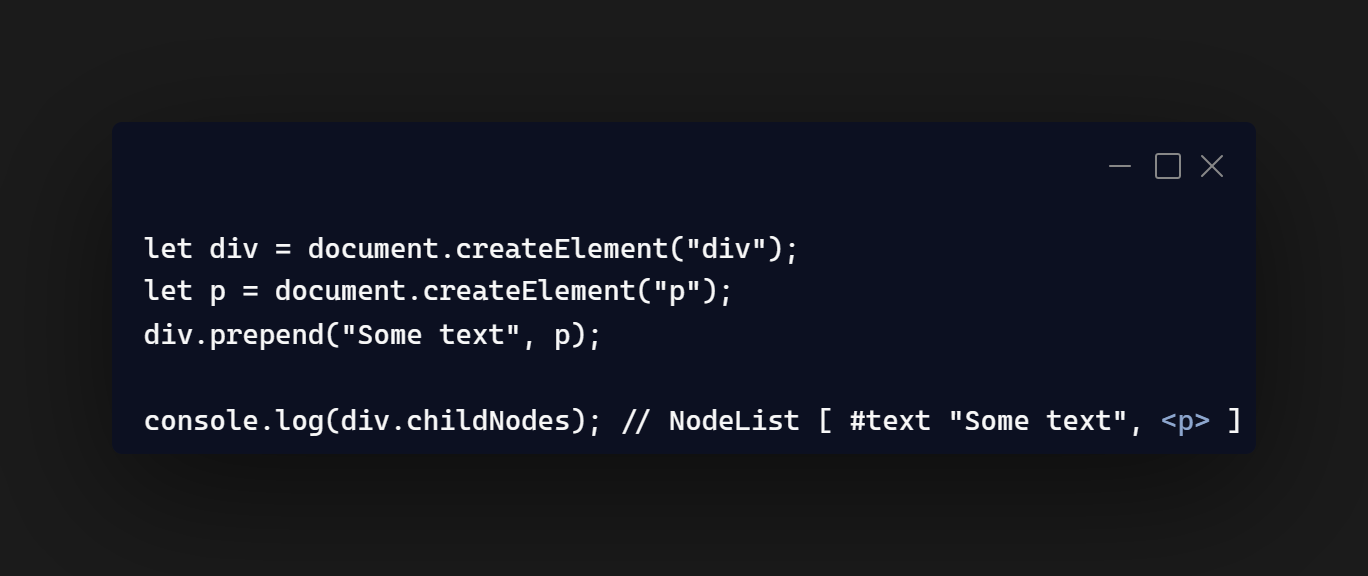
Prepending an element and text
The prepend method is unscopable
Element: insertAdjacentHTML() method
The insertAdjacentHTML() method of the Element interface parses the specified text as HTML or XML and inserts the resulting nodes into the DOM tree at a specified position.
Syntax
insertAdjacentHTML(position, text)
Parameters
position
A string representing the position relative to the element. Must be one of the following strings:
- "beforebegin"
- "afterbegin"
- "beforeend"
- "afterend"
text
The string to be parsed as HTML or XML and inserted into the tree.
Exceptions
This method may raise a DOMException of one of the following types:
NoModificationAllowedError
Thrown if position is "beforebegin" or "afterend" and the element either does not have a parent or its parent is the Document object.
SyntaxError
Thrown if position is not one of the four listed values.
Security considerations
When inserting HTML into a page by using insertAdjacentHTML(), be careful not to use user input that hasn't been escaped.
You should not use insertAdjacentHTML() when inserting plain text. Instead, use the Node.textContent property or the Element.insertAdjacentText() method. This doesn't interpret the passed content as HTML, but instead inserts it as raw text.
Javascript :
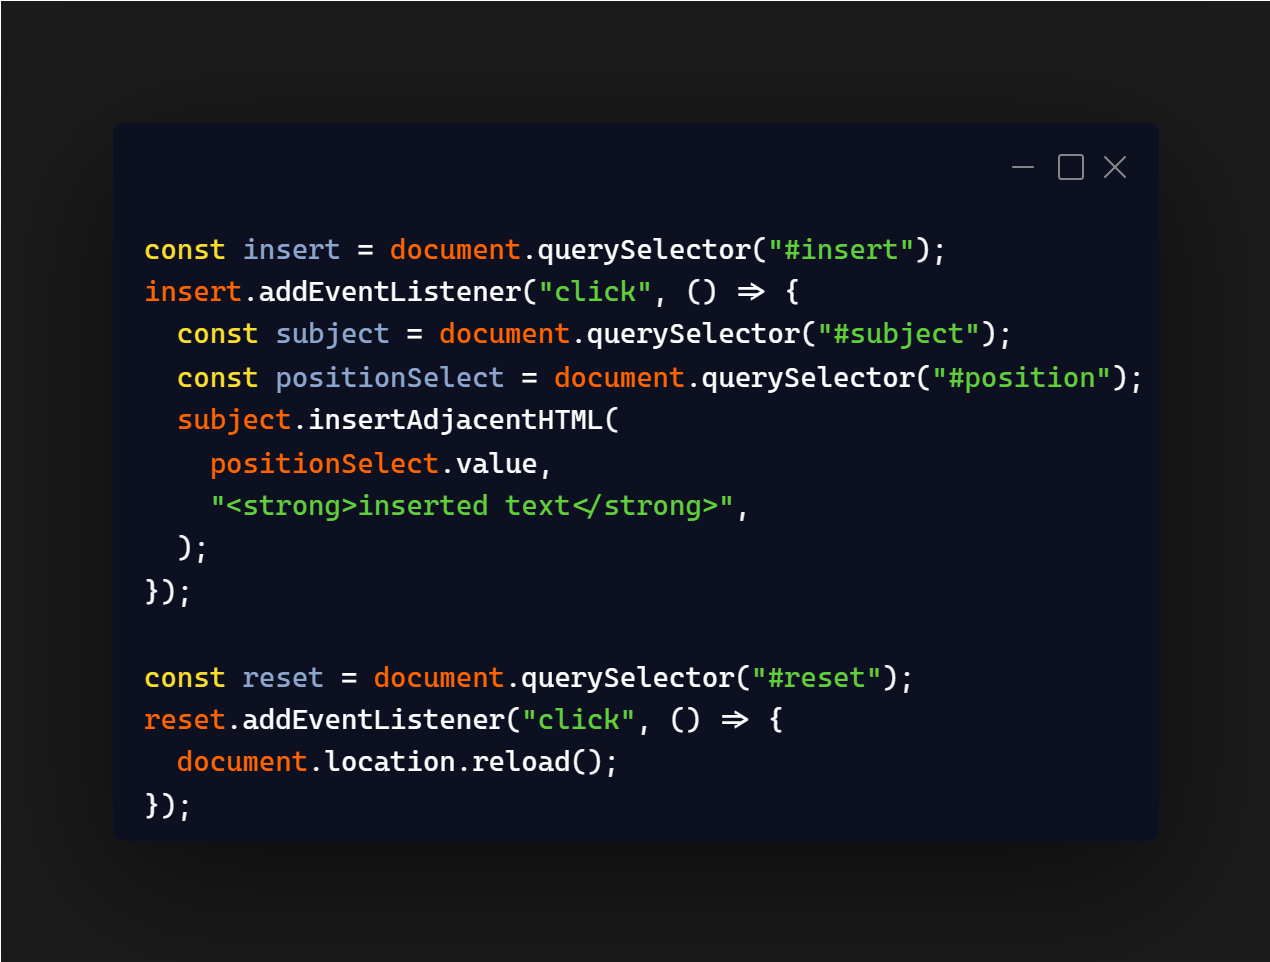
Result :

100 Button Insanity Exercise

Let's get some practice using append, appendChild, innerText and some loop iteration.
- Create exactly 100 new button elements.
- Each button must have some text inside of it
- Each button must be appended inside the container div.
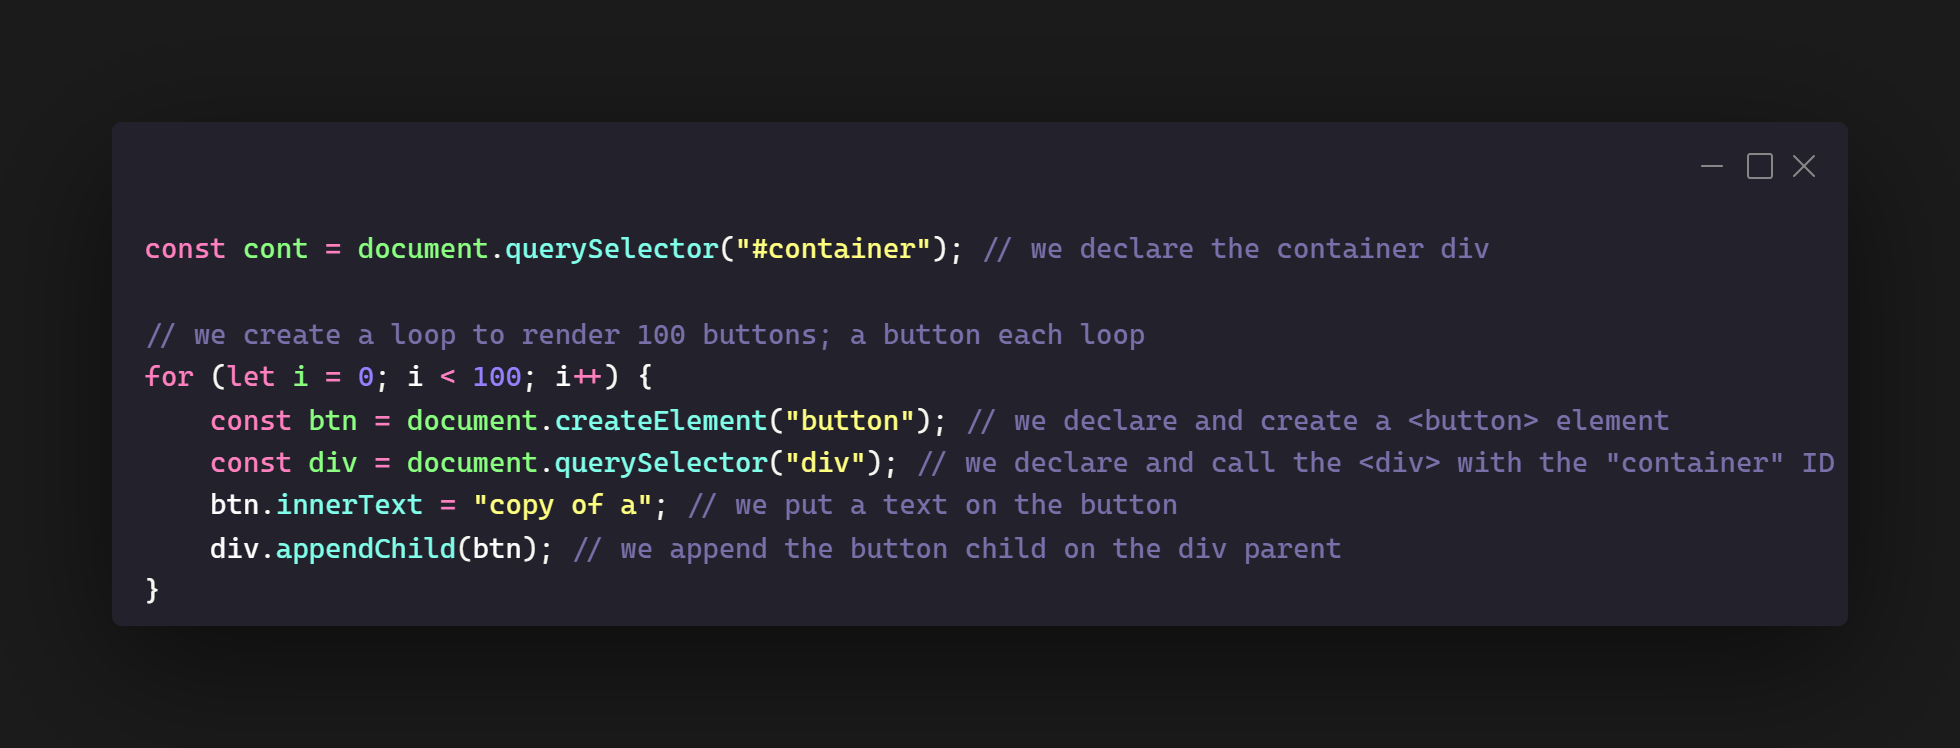
Result:

Change event
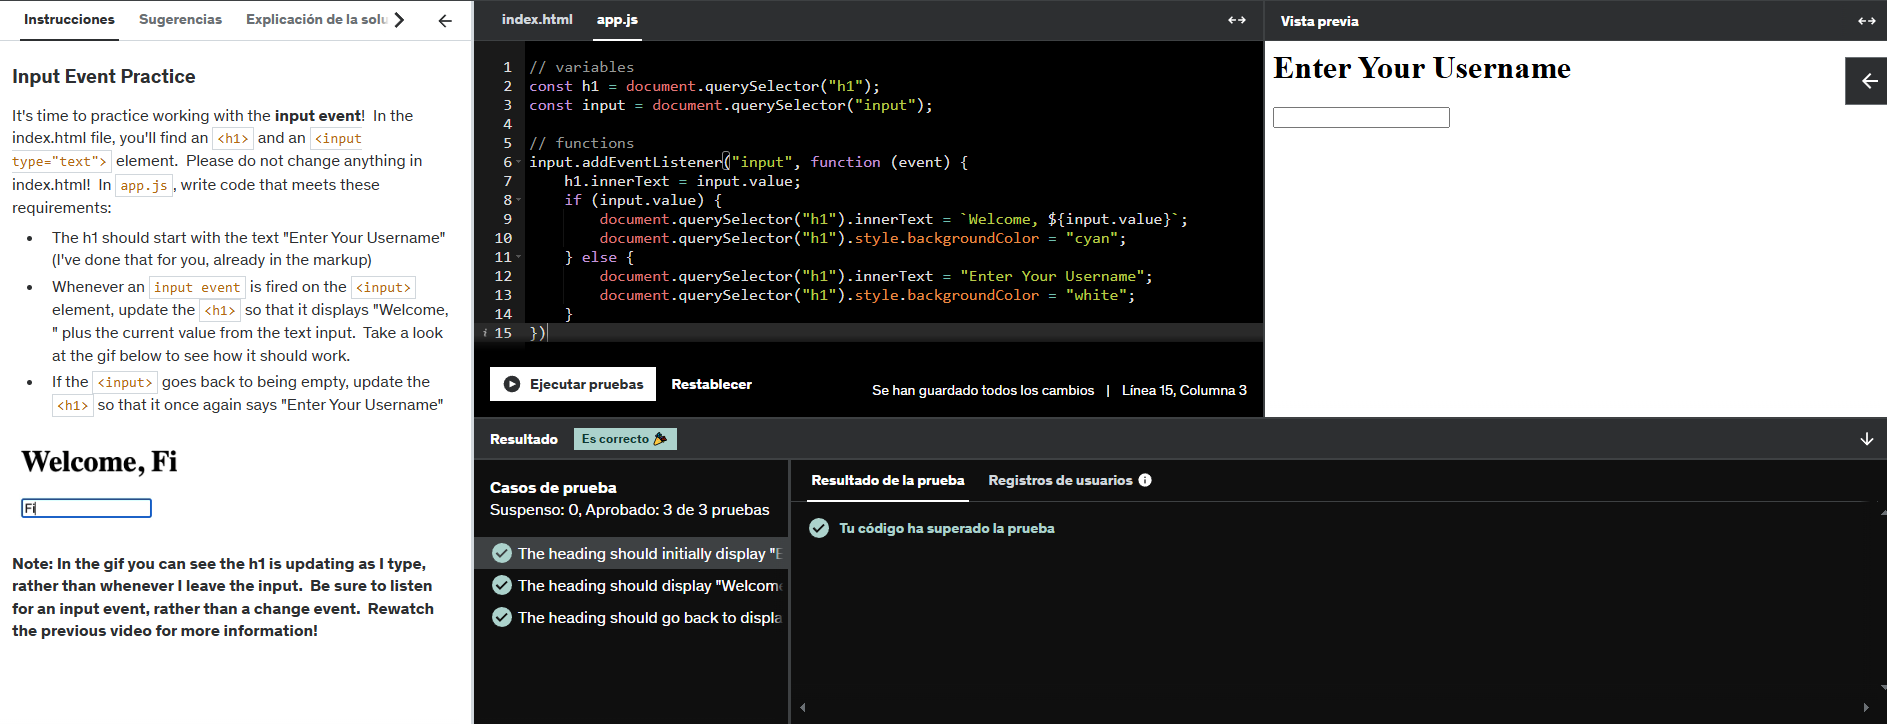
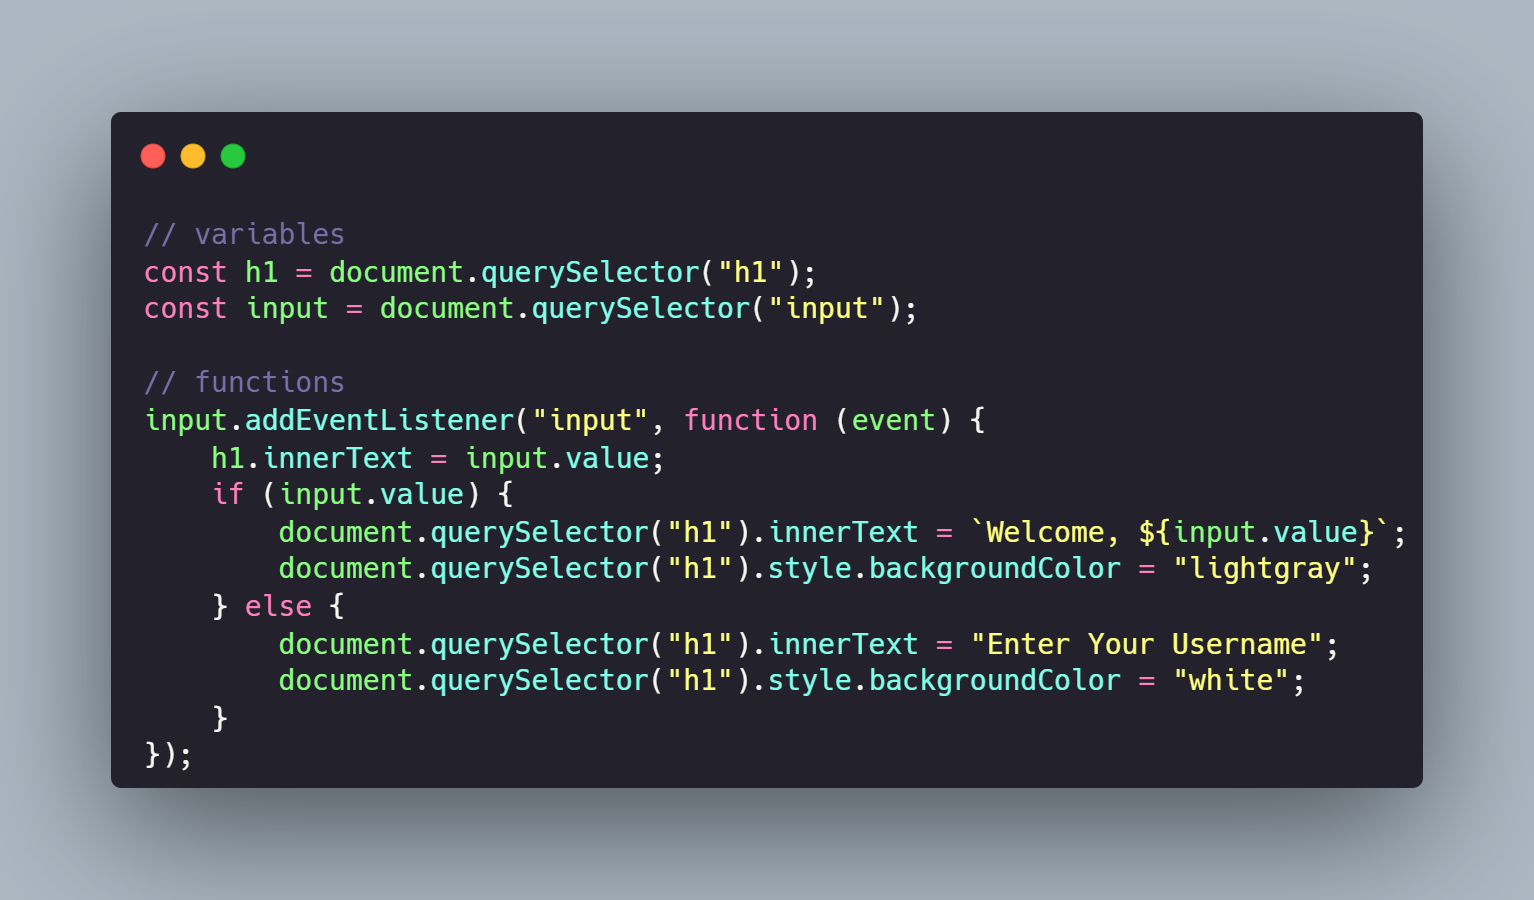
Let's get some practice using querySelector, addEventListener, innerText and some loop iteration.
- The h1 should start with the text "Enter Your Username" (I've done that for you, already in the markup)
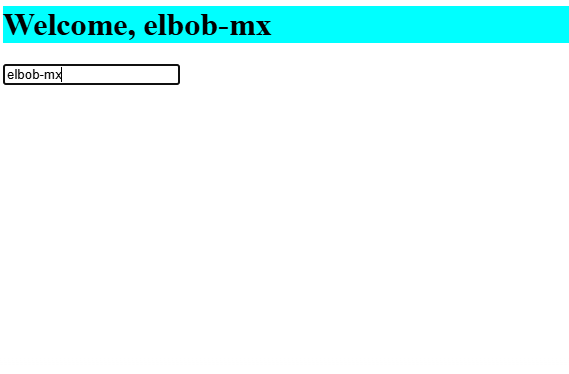
- Whenever an input event is fired on the "input" element, update the "h1" so that it displays "Welcome, " plus the current value from the text input. Take a look at the gif below to see how it should work.
- If the "input" goes back to being empty, update the "h1" so that it once again says "Enter Your Username"
Result:
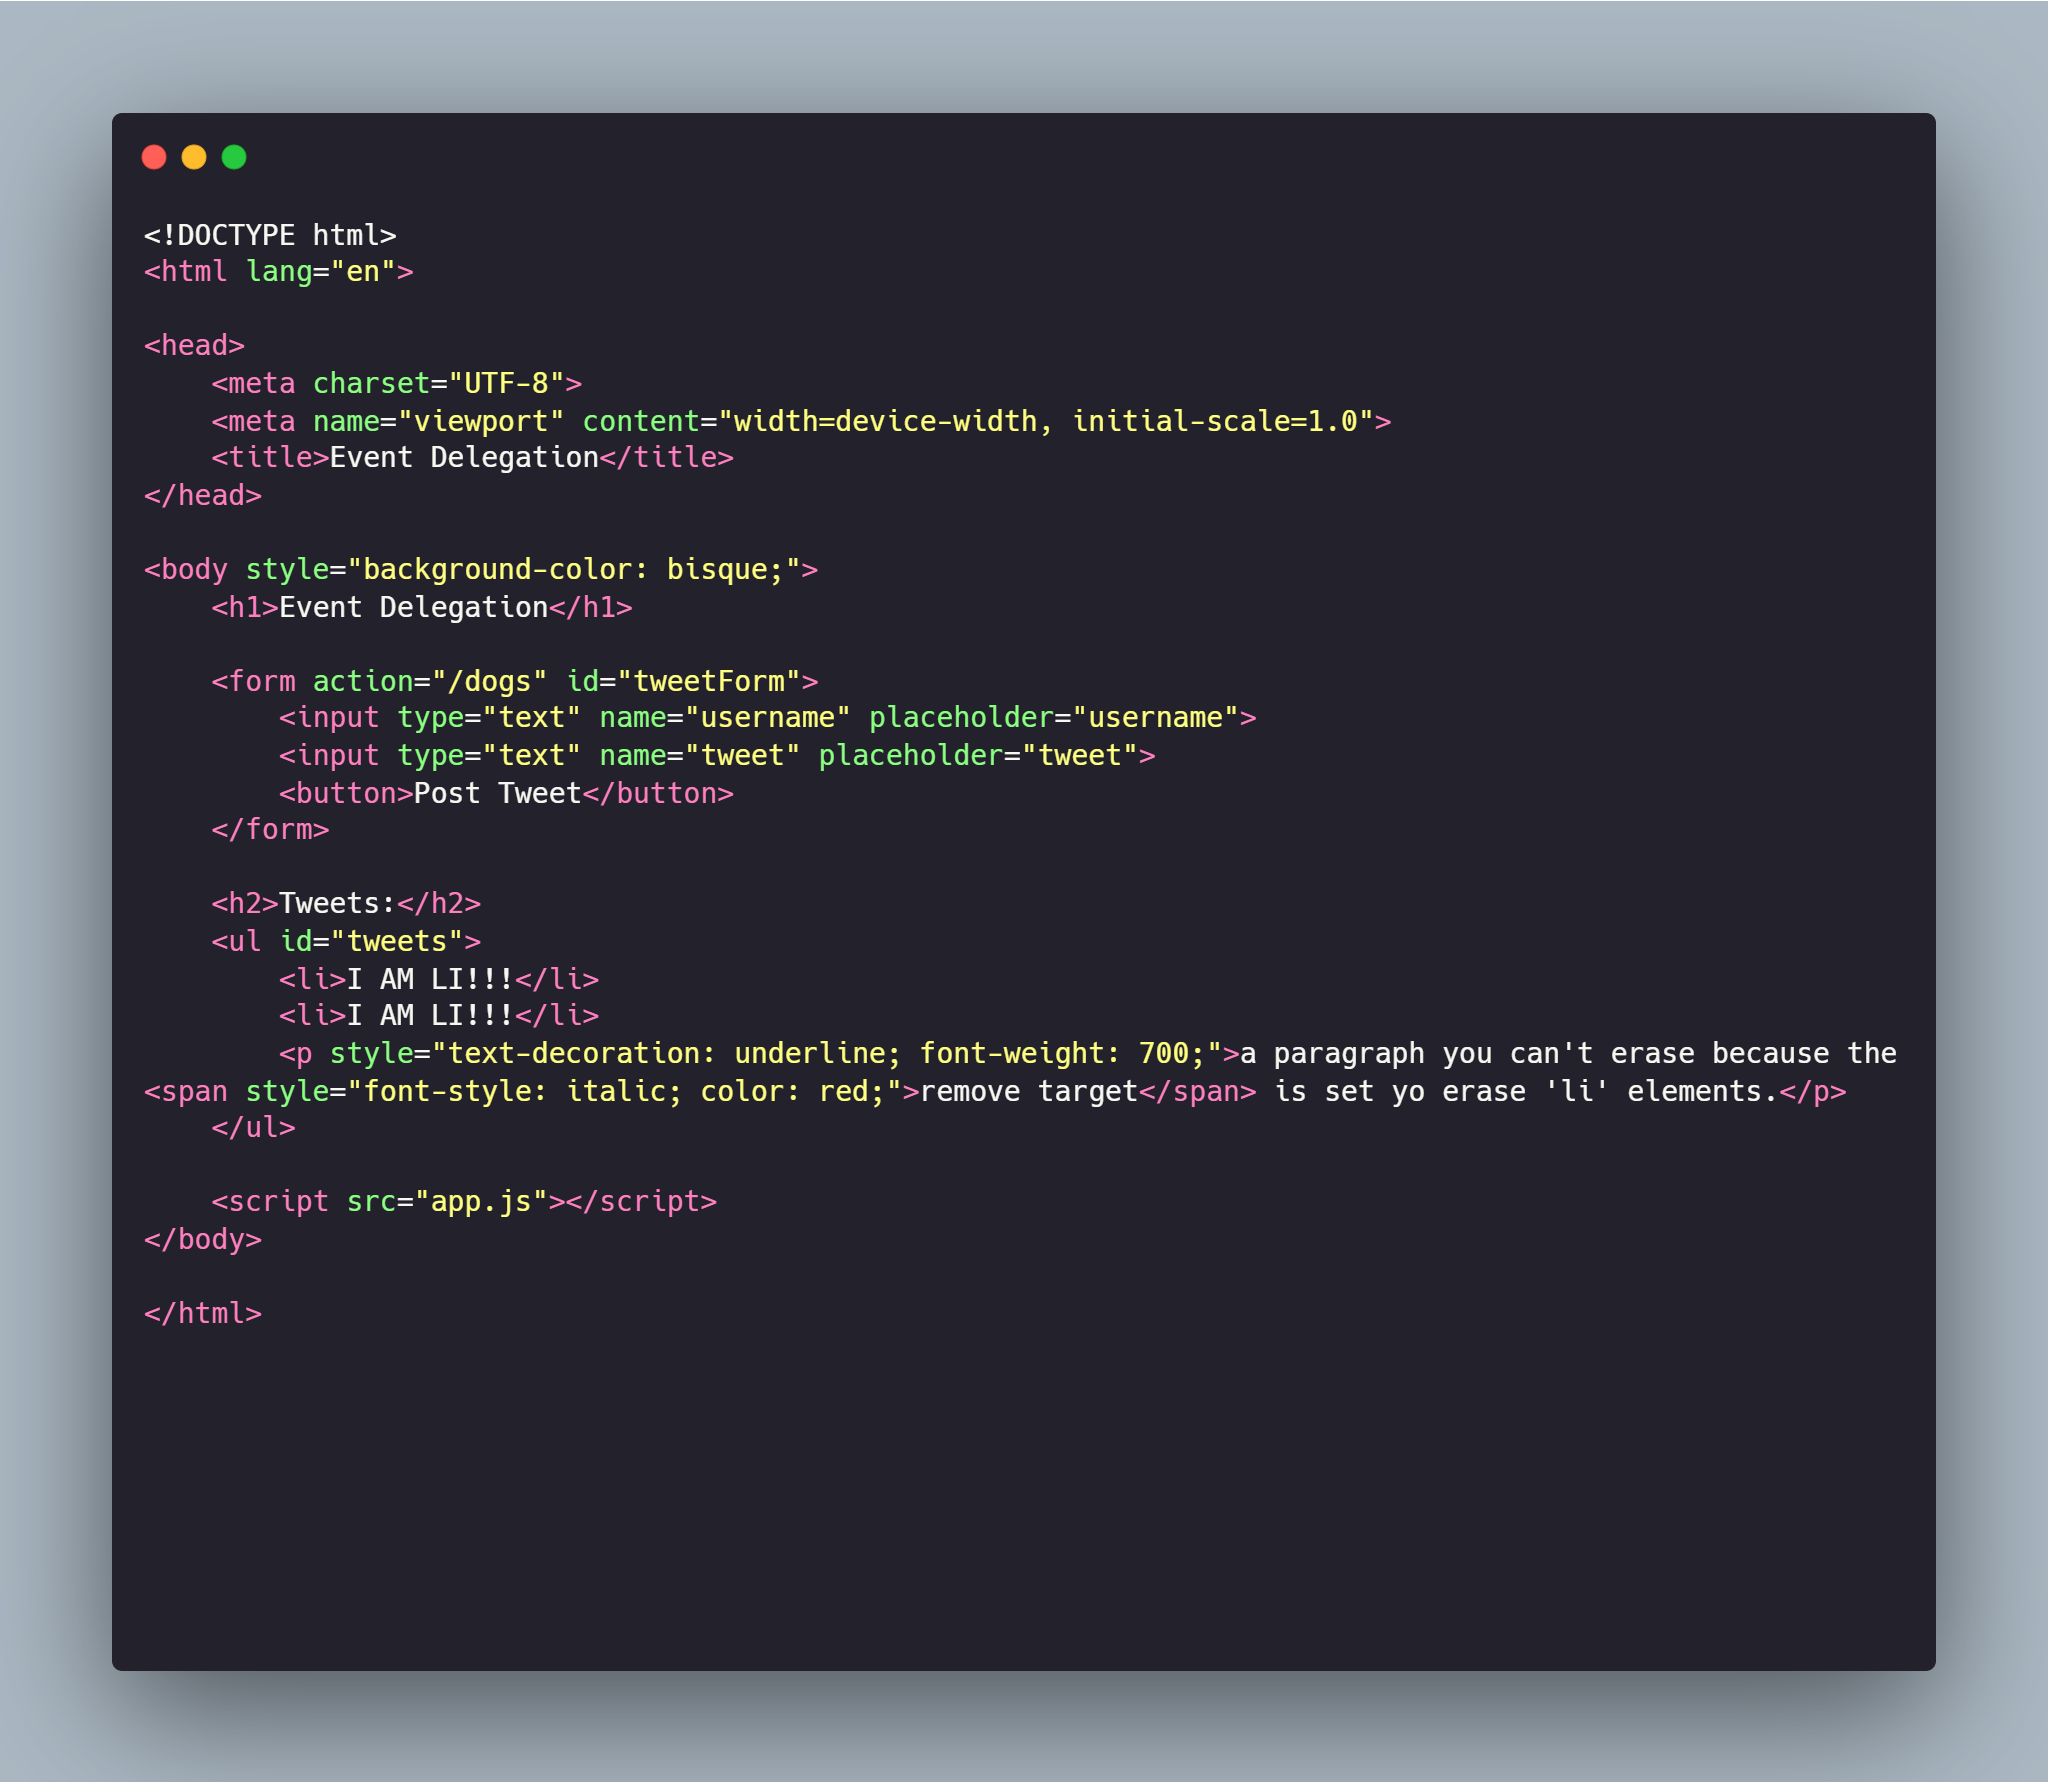
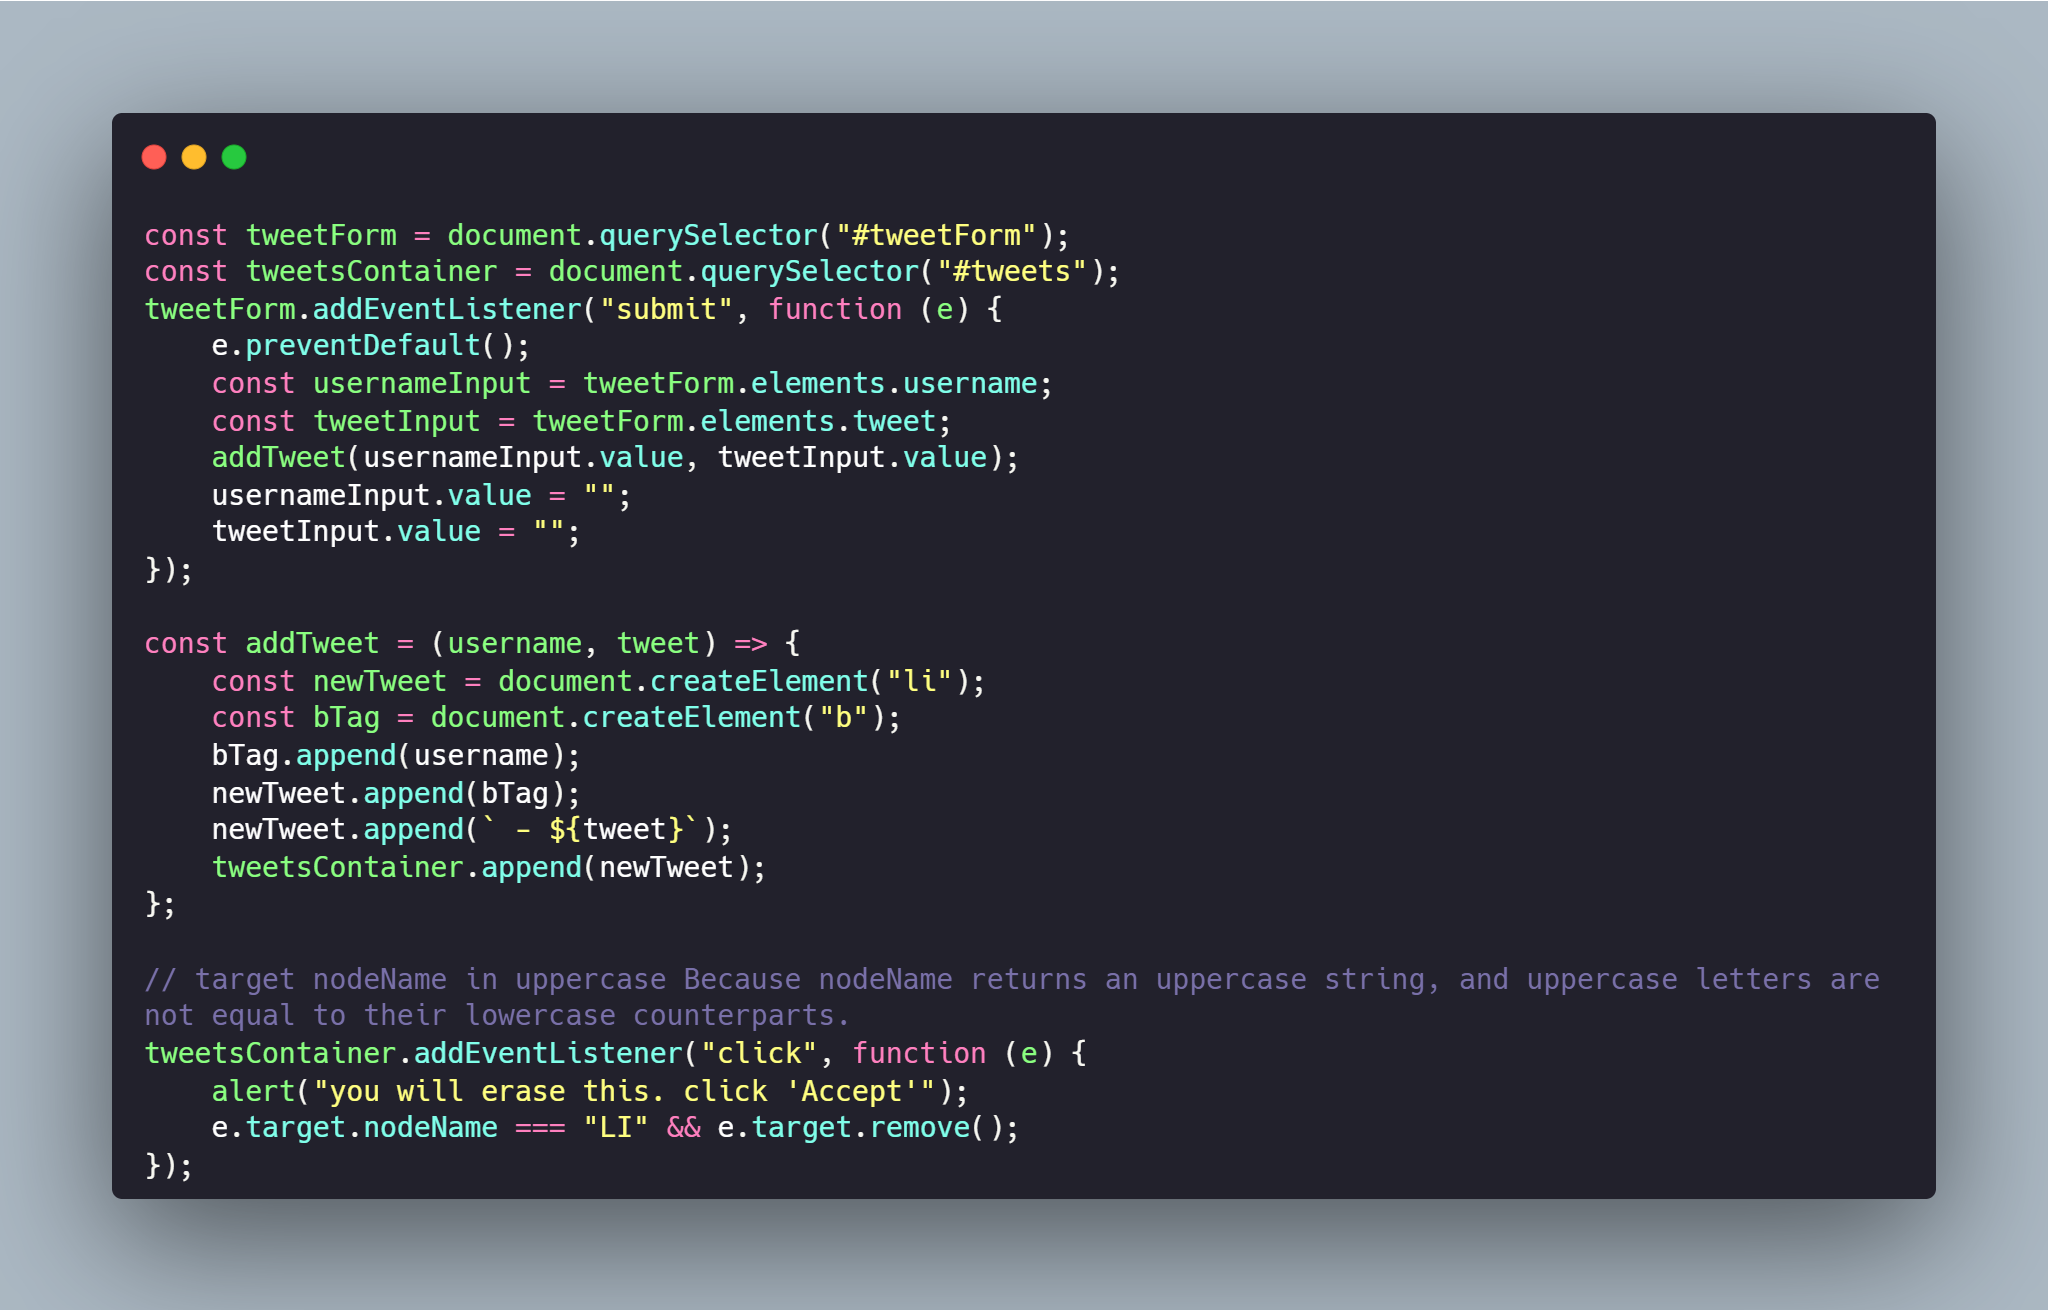
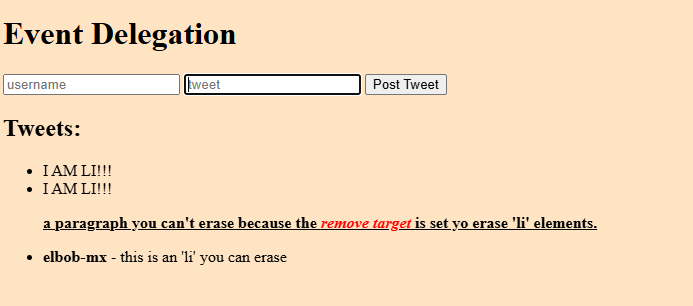
Event Delegation
Creating a Promise
MDN info 📚The Promise object represents the eventual completion (or failure) of an asynchronous operation and its resulting value.
A Promise is a proxy for a value not necessarily known when the promise is created. It allows you to associate handlers with an asynchronous action's eventual success value or failure reason. This lets asynchronous methods return values like synchronous methods: instead of immediately returning the final value, the asynchronous method returns a promise to supply the value at some point in the future.
A Promise is in one of these states:
- • pending: initial state, neither fulfilled nor rejected.
- • fulfilled: meaning that the operation was completed successfully.
- • rejected: meaning that the operation failed.
e.g.
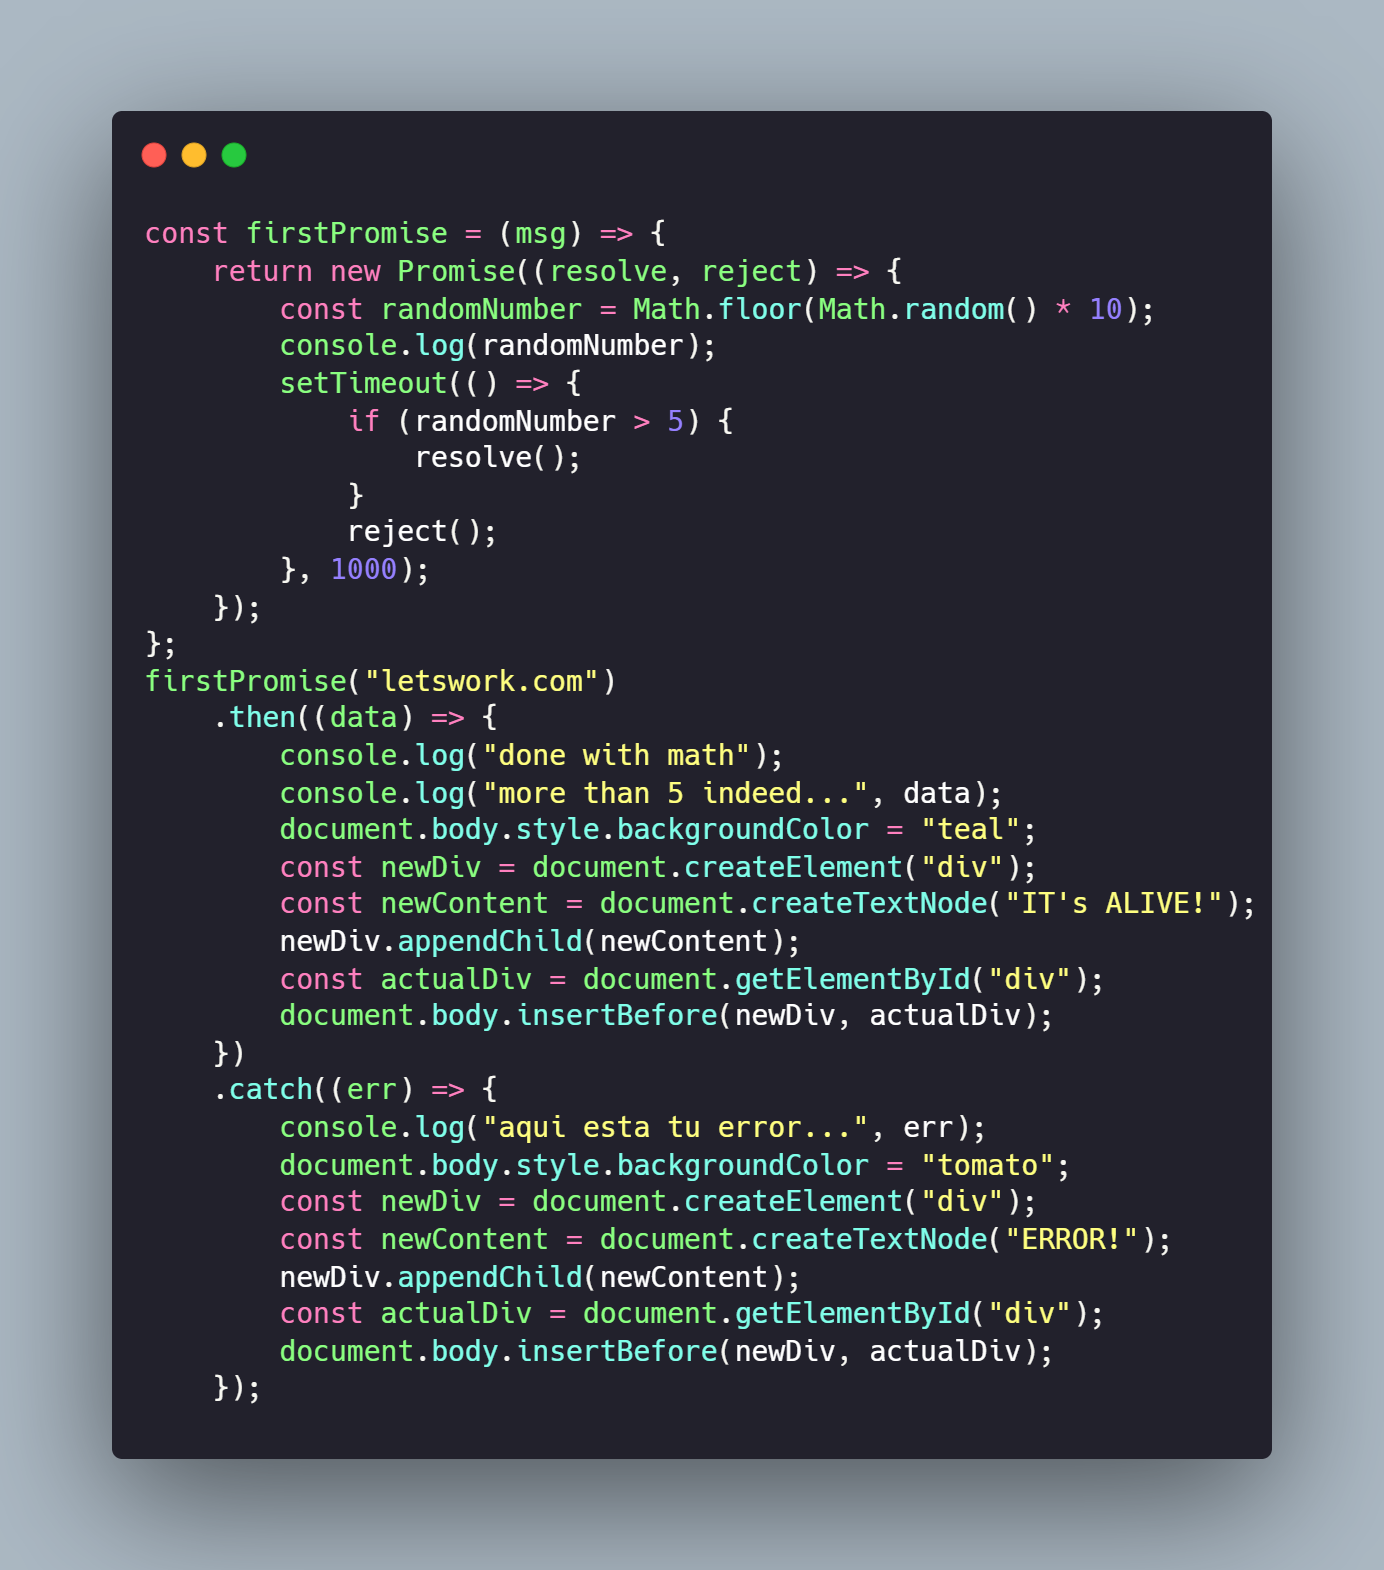
Try this code on your browser's console
const firstPromise = (msg) => {
return new Promise((resolve, reject) => {
const randomNumber = Math.floor(Math.random() * 10);
console.log(randomNumber);
setTimeout(() => {
if (randomNumber > 5) {
resolve();
}
reject();
}, 1000);
});
};
firstPromise("letswork.com")
.then((data) => {
console.log("done with math");
console.log("more than 5 indeed...", data);
document.body.style.backgroundColor = "teal";
const newDiv = document.createElement("div");
const newContent = document.createTextNode("IT's ALIVE!");
newDiv.appendChild(newContent);
const actualDiv = document.getElementById("div");
document.body.insertBefore(newDiv, actualDiv);
})
.catch((err) => {
console.log("aqui esta tu error...", err);
document.body.style.backgroundColor = "tomato";
const newDiv = document.createElement("div");
const newContent = document.createTextNode("ERROR!");
newDiv.appendChild(newContent);
const actualDiv = document.getElementById("div");
document.body.insertBefore(newDiv, actualDiv);
});
Async Functions
asysnc, throw, await & other fun stuff:
MDN info 📚
The async function declaration creates a binding of a new async function to a given name. The await keyword is permitted within the function body, enabling asynchronous, promise-based behavior to be written in a cleaner style and avoiding the need to explicitly configure promise chains.
An async function declaration creates an AsyncFunction object. Each time when an async function is called, it returns a new Promise which will be resolved with the value returned by the async function, or rejected with an exception uncaught within the async function.
function foo() { return Promise.resolve(1); }
Even though the return value of an async function behaves as if it's wrapped in a Promise.resolve, they are not equivalent. An async function will return a different reference, whereas Promise.resolve returns the same reference if the given value is a promise. It can be a problem when you want to check the equality of a promise and a return value of an async function.
const p = new Promise((res, rej) => {
res(1);
});
async function asyncReturn() {
return p;
}
function basicReturn() {
return Promise.resolve(p);
}
console.log(p === basicReturn()); // true
console.log(p === asyncReturn()); // false
Await keyword
The await operator is used to wait for a Promise and get its fulfillment value. It can only be used inside an async function or at the top level of a module.
- • We can only use the await keyword inside of functions declared with async. *LATEST UPDATE
- • await will pause the execution of the function, waiting for a promise to be resolved.
try...catch
Async error management
The try...catch statement is comprised of a try block and either a catch block, a finally block, or both. The code in the try block is executed first, and if it throws an exception, the code in the catch block will be executed. The code in the finally block will always be executed before control flow exits the entire construct.
The try statement always starts with a try block. Then, a catch block or a finally block must be present. It's also possible to have both catch and finally blocks. This gives us three forms for the try statement:
- • try...catch
- • try...finally
- • try...catch...finally
Unlike other constructs such as if or for, the try, catch, and finally blocks must be blocks, instead of single statements.
A catch block contains statements that specify what to do if an exception is thrown in the try block. If any statement within the try block (or in a function called from within the try block) throws an exception, control is immediately shifted to the catch block. If no exception is thrown in the try block, the catch block is skipped.
The finally block will always execute before control flow exits the try...catch...finally construct. It always executes, regardless of whether an exception was thrown or caught.